
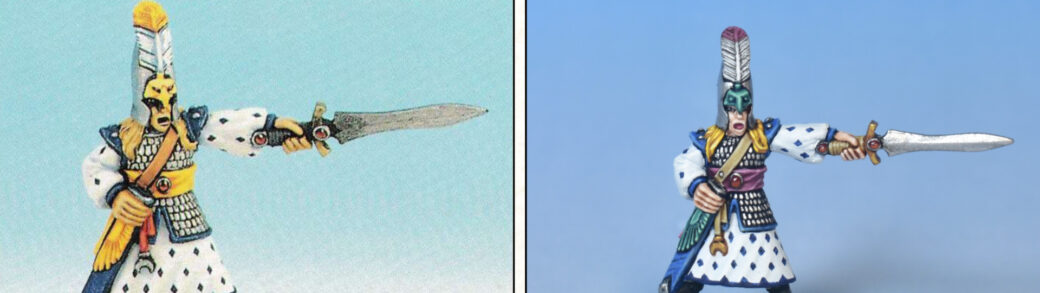
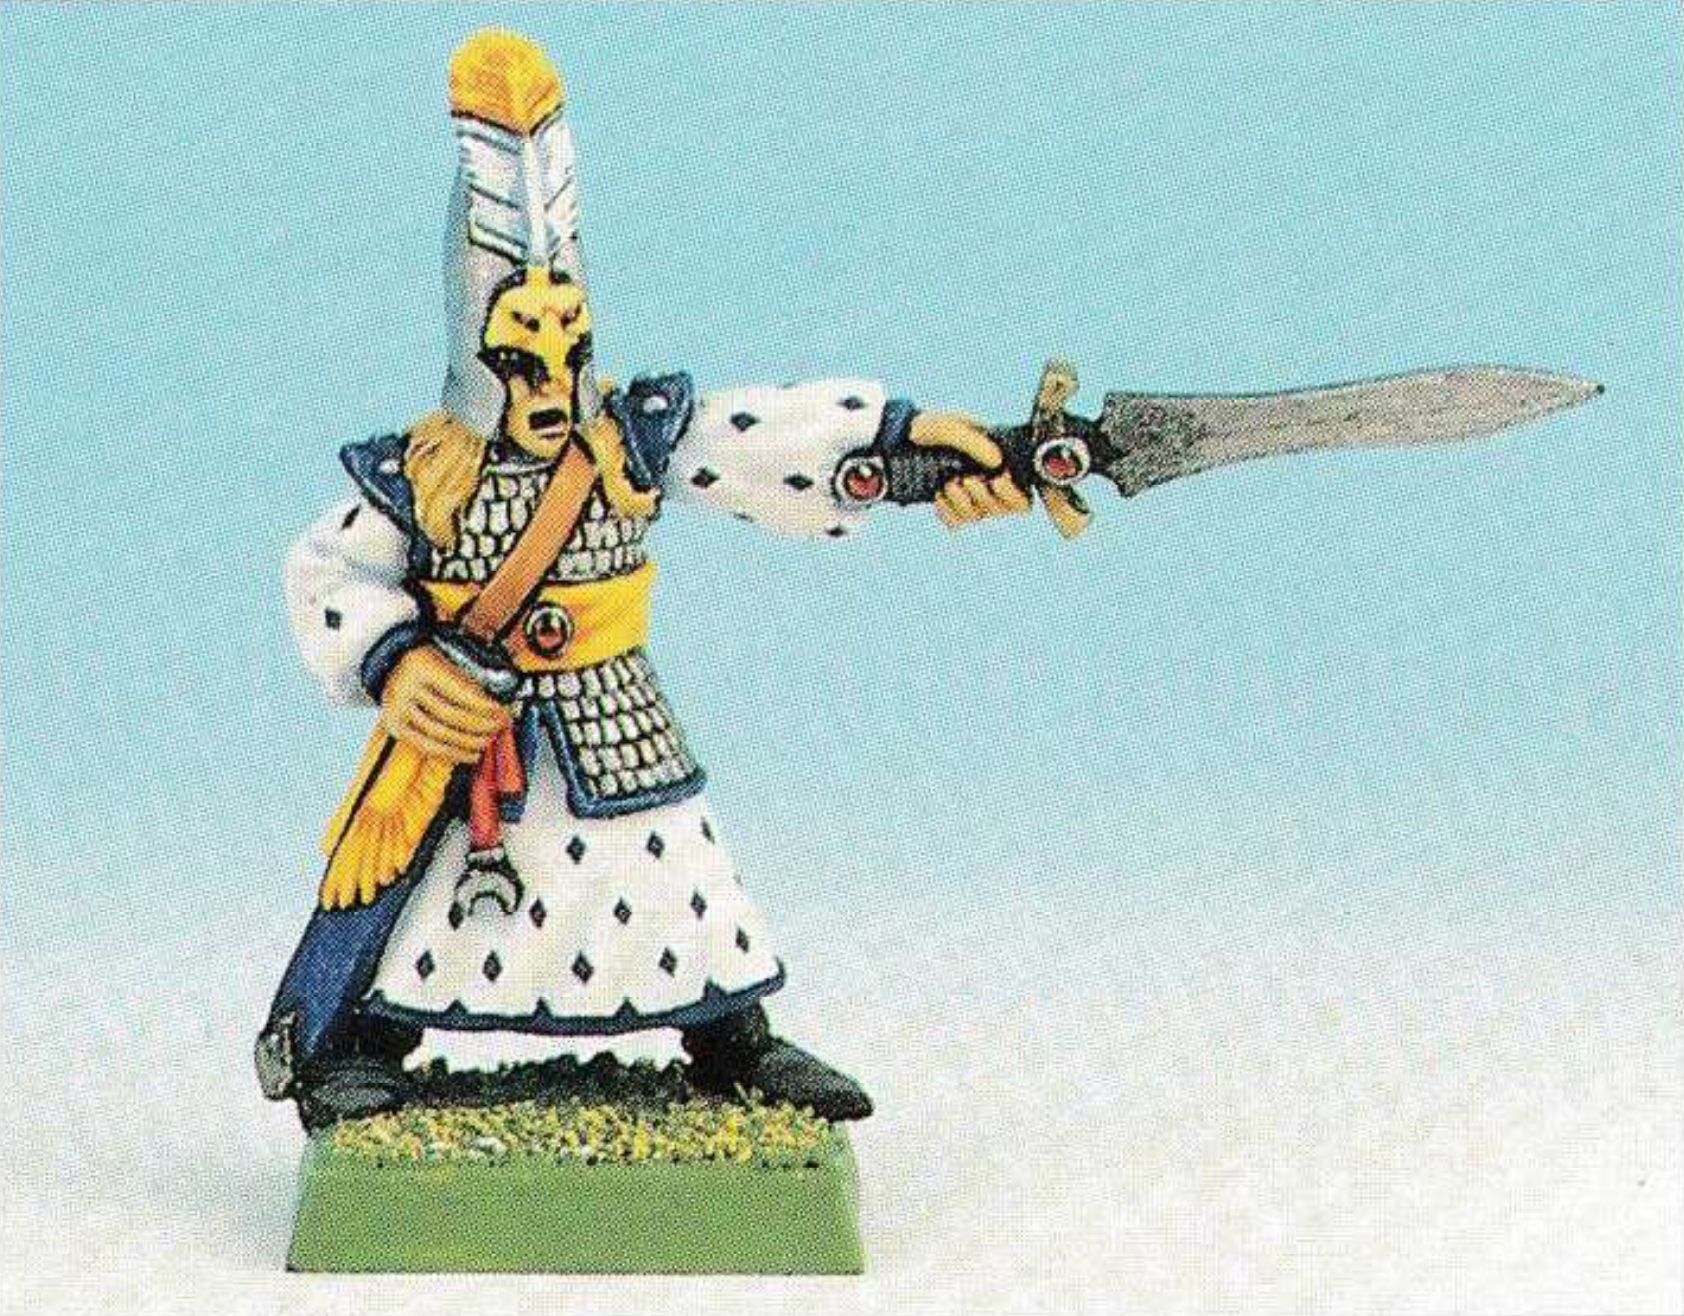
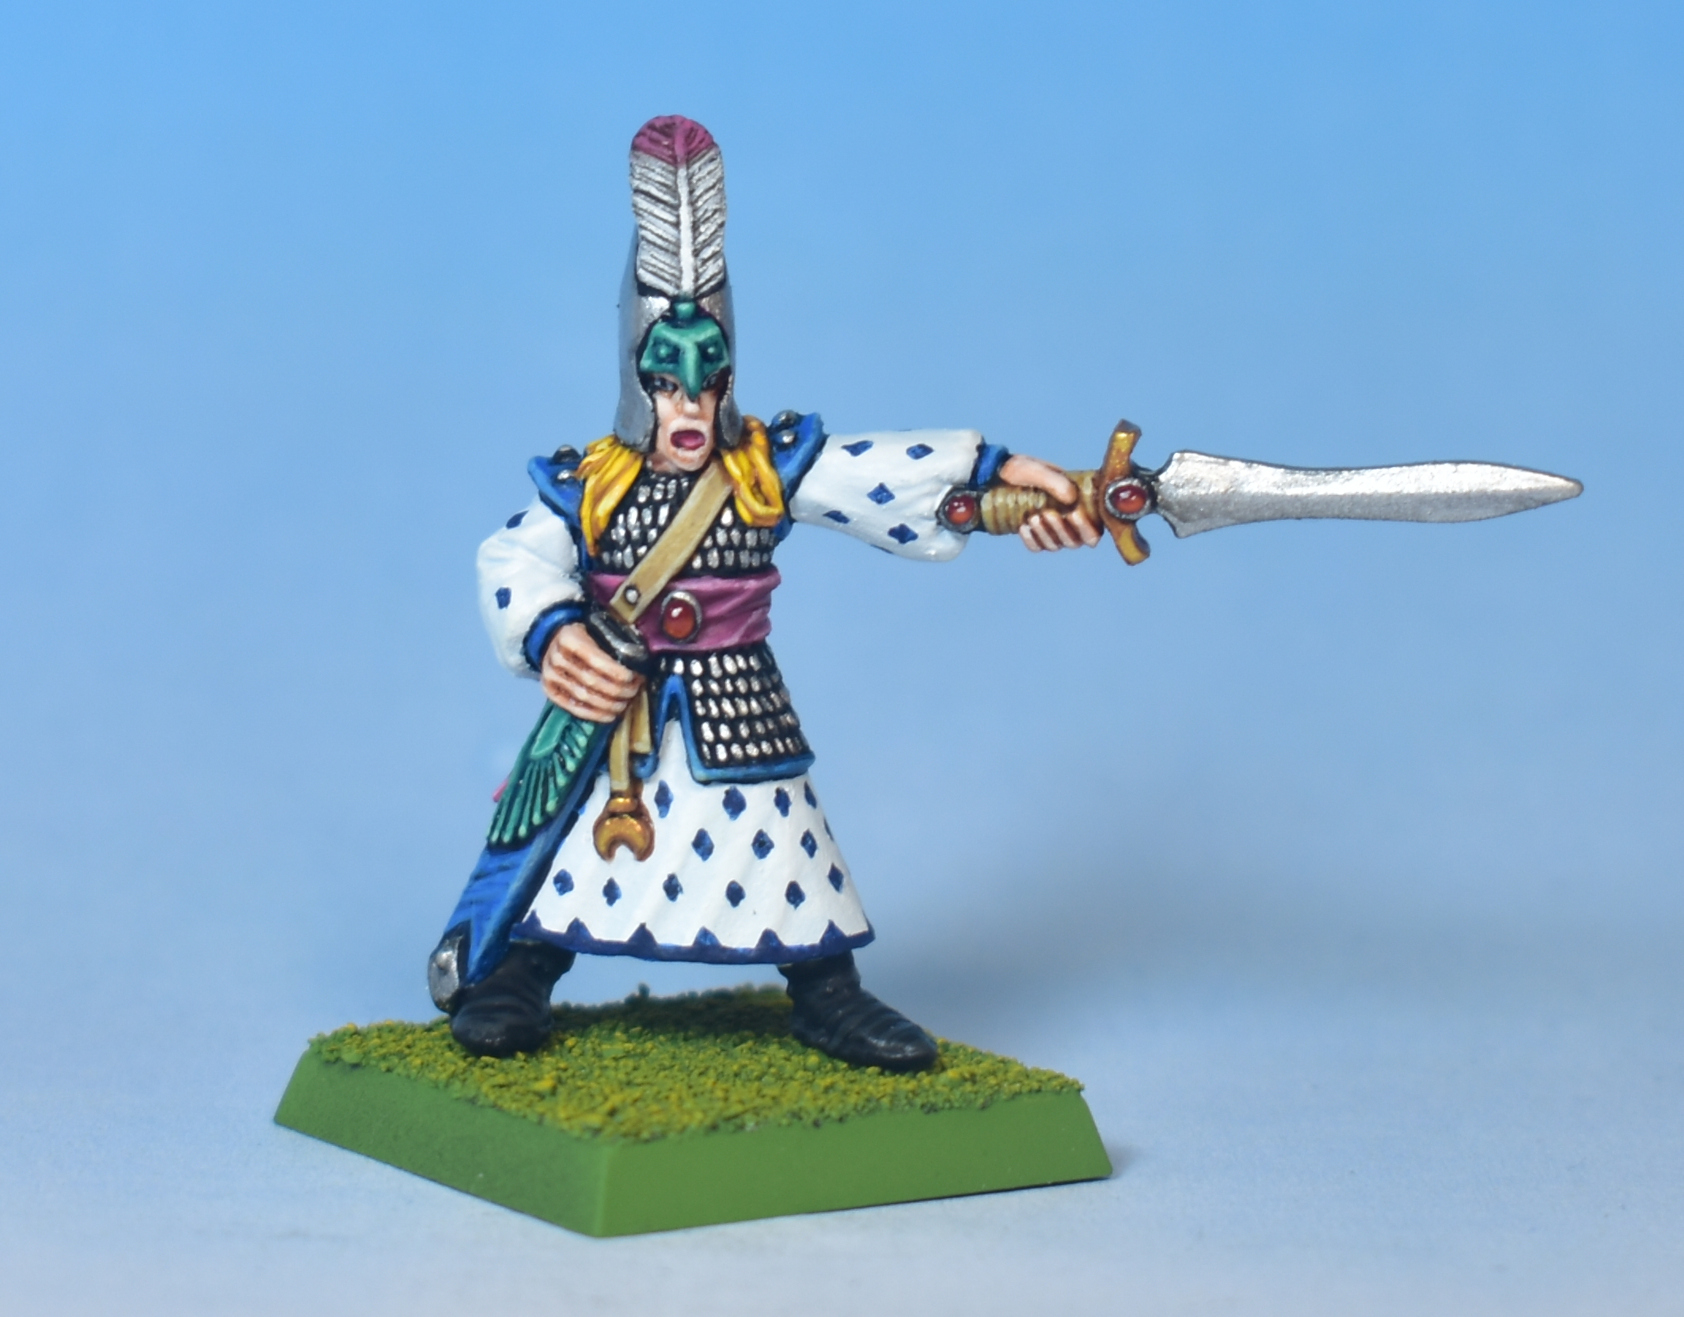
In this tutorial I’m going to try and replicate as best as possible a classic High Elf paint job from the 1993 “Complete Guide to Painting Citadel Miniatures” by Mike McVey. This model is one of the crew members of an Eagle Claw Bolt Thrower, and he is featured in the painting guide as an example on how to use patterns to make plain surfaces more interesting to look at.
Foreword
Having recently acquired a copy of Mike McVey’s “Complete Guide to Painting Citadel Miniatures” from 1993, I noticed a particular image of a High Elf Eagle Claw Bolt Thrower crew member that I happen to own.
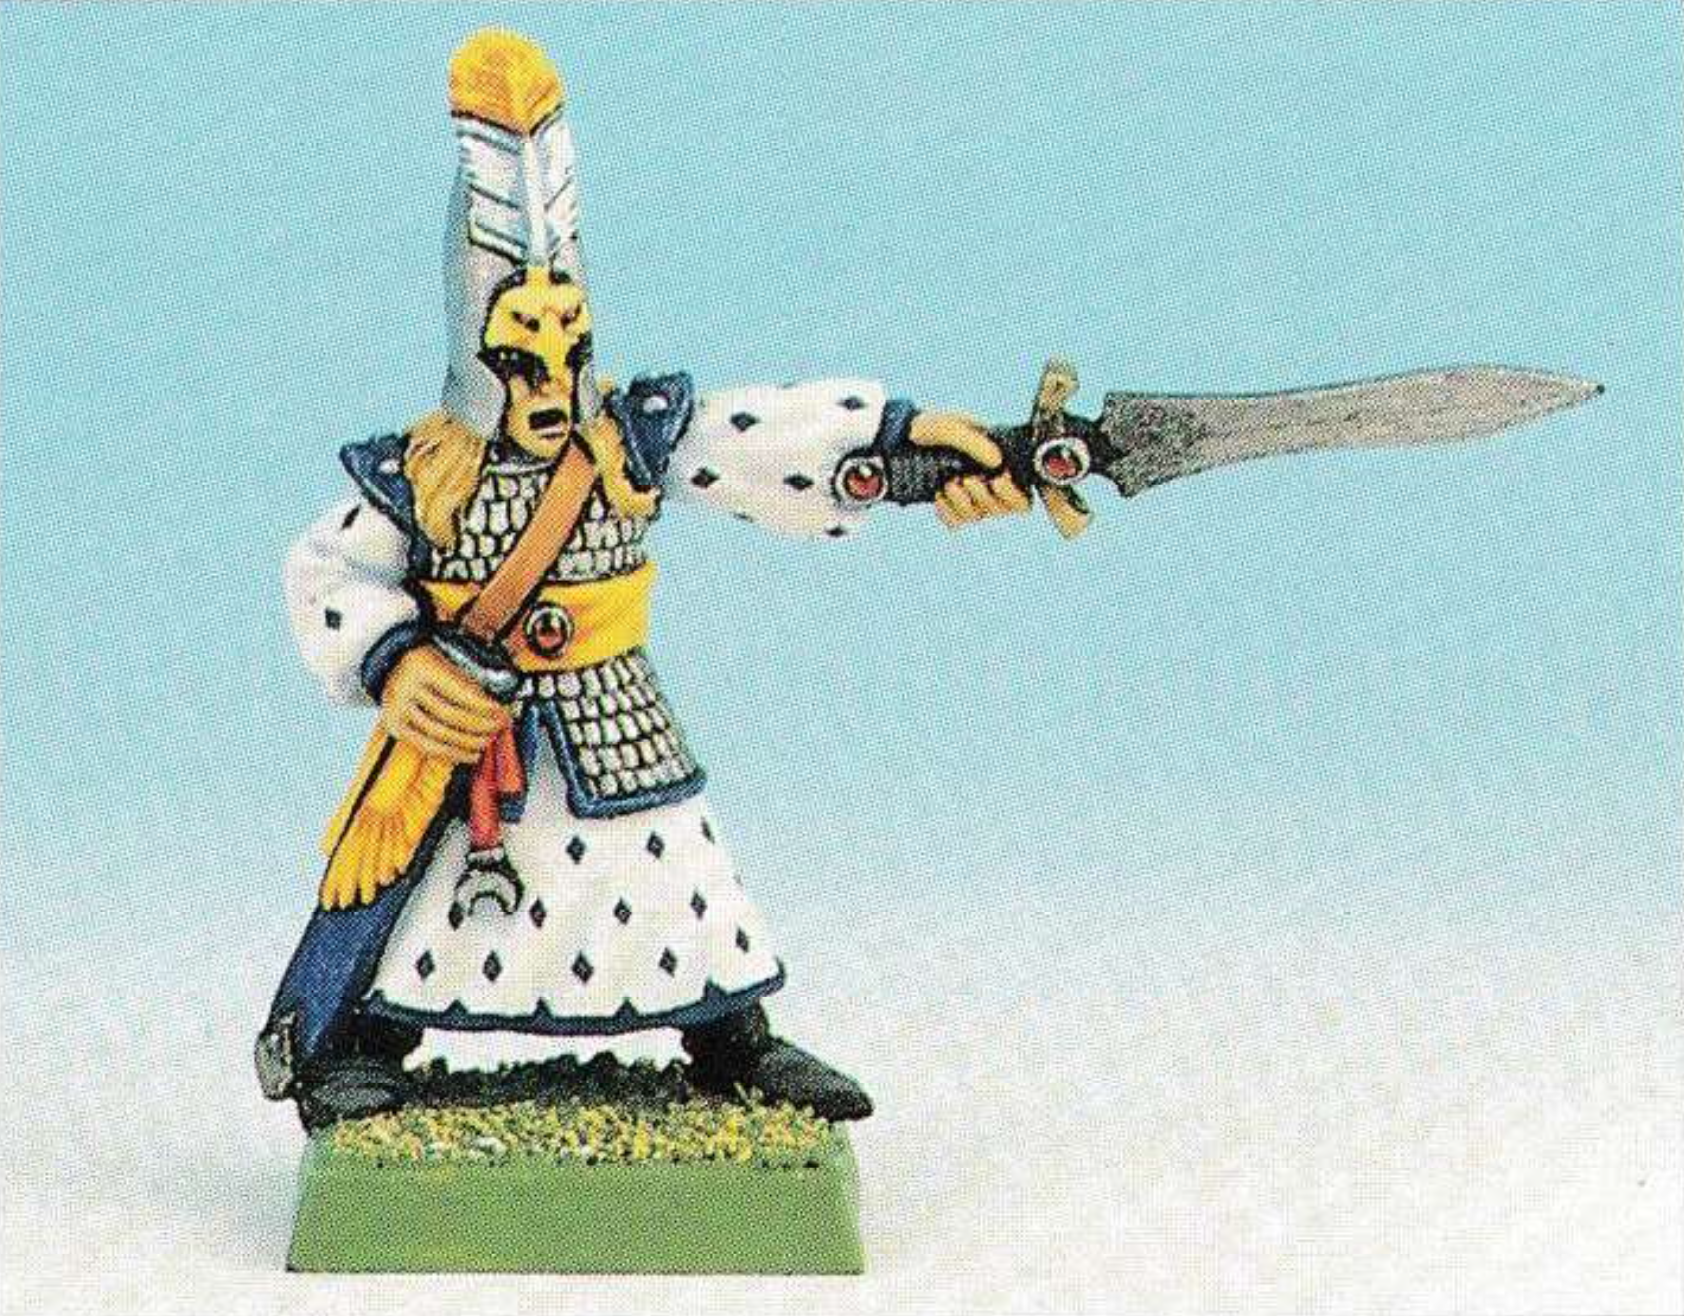
This model is used in a section on painting Patterns and Decorations, and I thought it was a good idea to see if I could replicate it!
The problem though, is that although there is some decent explanation on how to paint this type of pattern, there is no further guidance on how to achieve the rest of the colour scheme.
This is a recurring issue with the painting guides of old. They are full of excellent advice on how to paint in the ‘Eavy Metal style of the nineties, and they sometimes explain certain elements in nice step-by-step photographs, but a lot of details are left out as well.
So, with this tutorial I am going to try and de-mystify the entire paint job (while taking some artistic liberties along the way).
The result is a step-by-step guide on how to achieve pretty much everything you see in this High Elf model, from the skin, to the robes, the metal and the details.
Everything is of course my interpretation on how to achieve this ‘Eavy Metal style, and first, I am not as skilled as the Games Workshop painters of old, and second, I aim to keep the colour schemes reasonable (so limited to four or five steps per colour).
Preparation
As with all miniatures, we should start by cleaning up the model. If you found a second hand model that was already painted, the first step is to remove the old paint. I use Isopropyl Alcohol (95%) for this, since its readily available and it works well on both plastic and metal models. Leave the miniature in a small glass container with the alcohol and brush off the paint with an old toothbrush (the harder the bristles, the better).
The next step is to clean up the miniature. Since this is an old metal model, we use some metal files to sand off the mould lines, and use a sharp knife to cut away any little metal ‘tubes’ that are attached to the model in the places where the molten metal is injected into the mould. These little tubes can often be found at the extremities of the model such as the tip of the feet, the tip of the sword, and the top of the helmet.
Next, because we are aiming for a level of painting that is somewhat above “tabletop standard”, I prefer to mount the miniature on a piece of cork with a thin metal tube — rather than having the model glued to his base and holding it on a traditional miniature handle.
Having the model glued to its base can make certain areas more difficult to reach from below, while being mounted on a piece of cork gives the best access for painting.
Undercoat
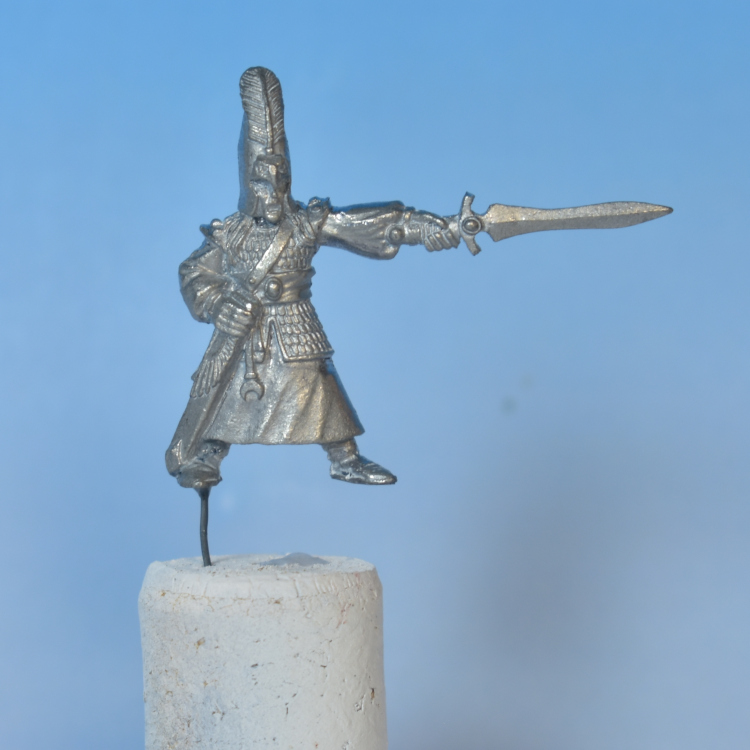
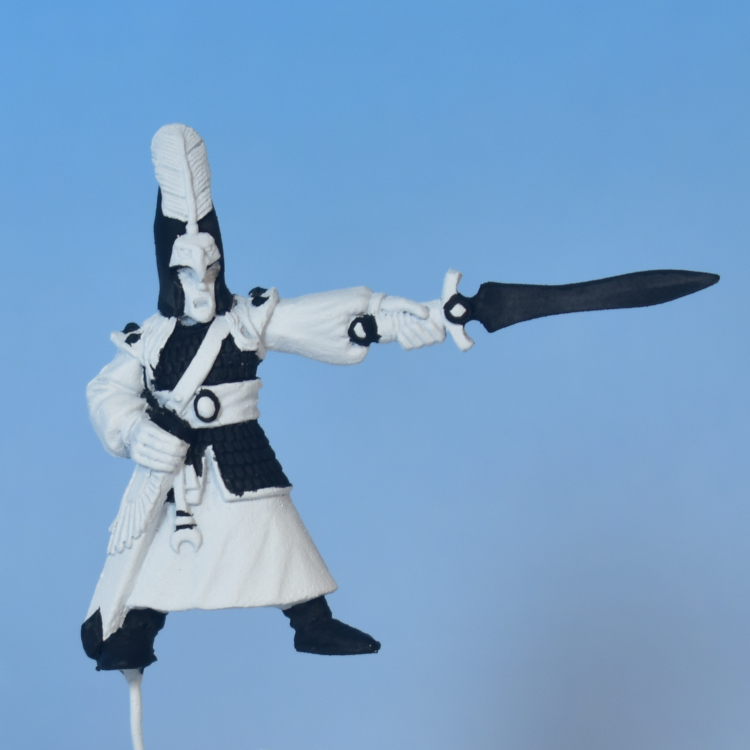
White is almost always my preferred choice of undercoat, and with this particular model it is certainly the obvious choice. Of course, a light grey undercoat would work as well, but I certainly wouldn’t recommend anything darker than that. In this case, we start with an undercoat of Citadel: White Scar applied from a rattle can.
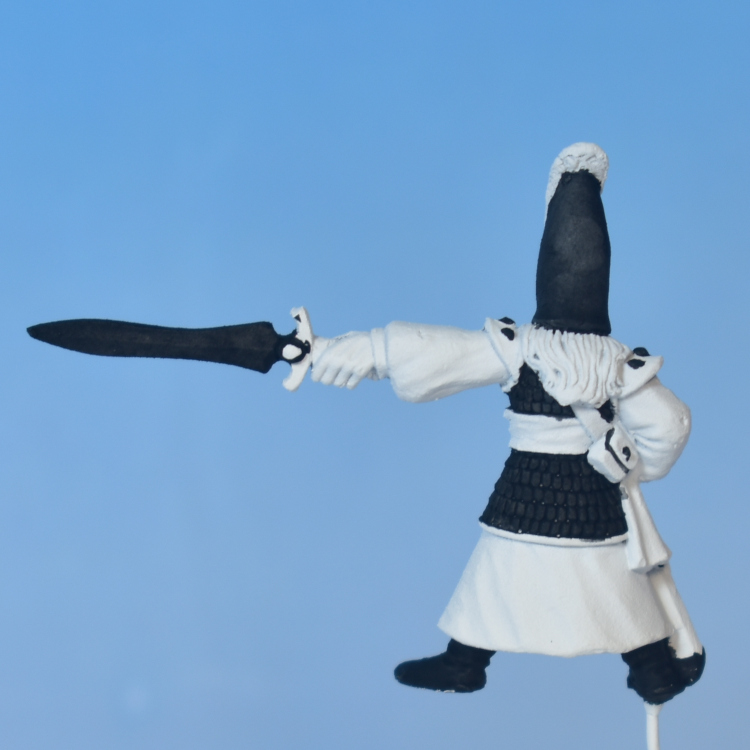
Next, to finish our “undercoat” stage, we take some Vallejo Game Color: Black (72.051), or any deep black colour, and start blocking in all the areas that will receive a silver metallic coat later on. At this stage we also paint the boots black, since this will be their chosen colour. Even in an ‘Eavy Metal style High Elf, full of bold, bright colours, you want to choose something as neutral as possible for the boots; there’s simply no reason that the eye should be drawn to them. At this stage, it’s also worth to apply black to any areas that are in extremely deep shade. Where the right arm meets the body, and where the scabbard meets the sash for example.
If you want you can take this step much further, and paint black lines between all the different materials on the model. It’s a stylistic choice how much of this “black lining” to do, and I personally prefer to keep it to a minimum.
Try to work as neatly as possible, and don’t get any black on the cloth or face. Otherwise, small mistakes are fine and we’re not going back and forth with white and black to clean up mistakes at this stage. Next up, it’s time to add some colour.
Skin
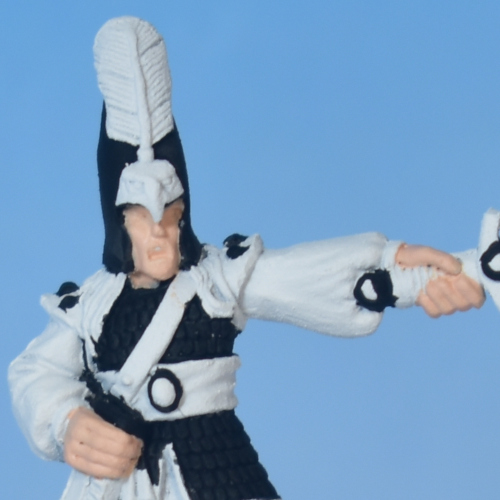
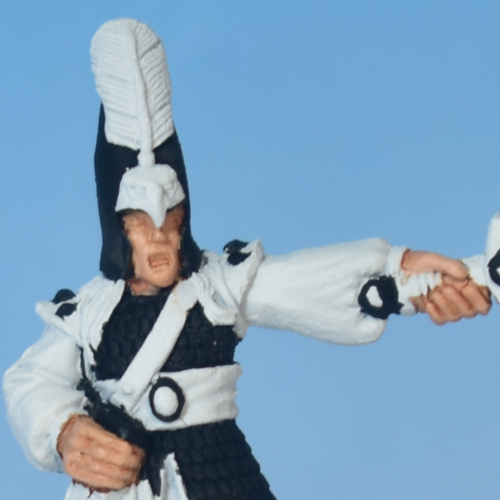
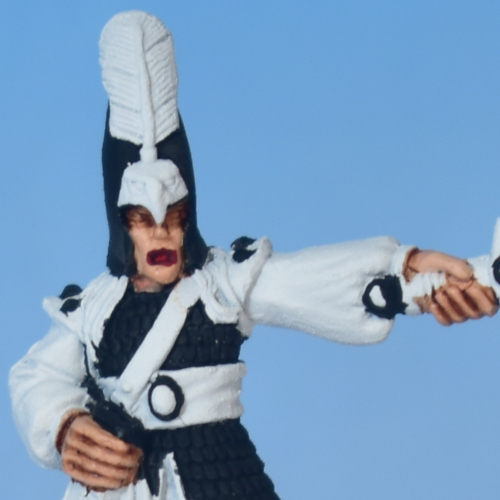
High Elves have pale, fair skin, so our colour scheme is going to be a little different compared to painting Dwarf faces and skin. Also, since a model’s face is the most important part of any paint job, and we are aiming at something that is more “display standard” than “tabletop standard”, we are going to take our time and take a 6-stage approach.
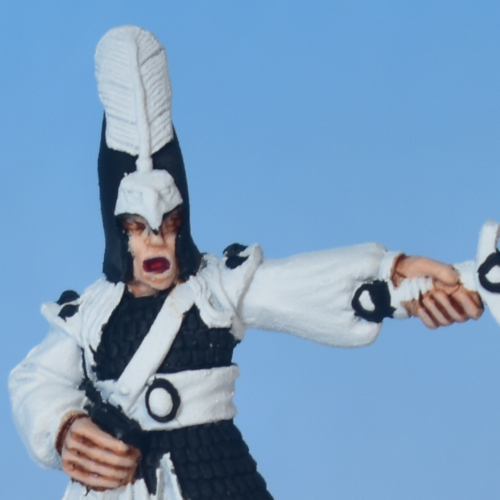
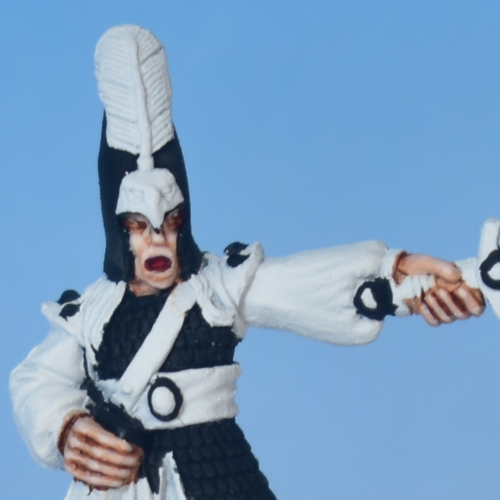
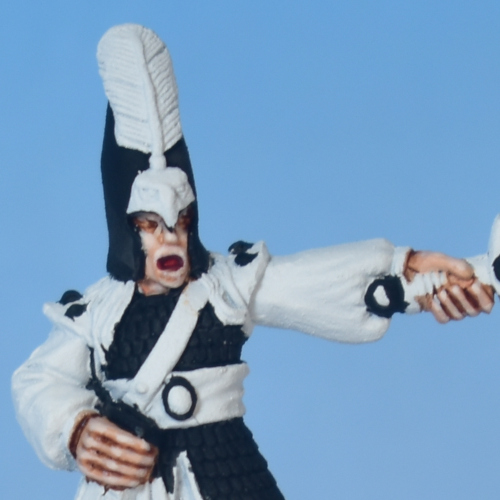
Stage 1. We apply a base coat of Vallejo: Pale Flesh to all exposed skin areas; in this case the face and hands.
Stage 2. We cover all skin with a thinned down wash of Citadel: Reikland Fleshshade (approximately 2 parts paint to 1 part water). Thinning down the wash will help with reducing the amount of staining, and thus keeping our base coat quite bright, while we still get some nice basic shades in the recesses of the skin.
Stage 3. In some specific parts of the skin we want to create some deeper shadows. In this stage, we apply thin lines of pure Reikland Fleshshade between the fingers, as well as apply some in the eye sockets. We also add some pure Citadel: Flesh Tearers Red in the open mouth.
Stage 4. We start with the first of three layers of highlights with pure Vallejo: Pale Flesh, covering most areas of the skin except for the deepest recesses.
Stage 5. We add some Vallejo: Dead White to our Pale Skin and apply our second layer of highlights, focusing on all exposed parts like the cheekbones, the chin, and the individual fingers.
Stage 6. Adding a little more Vallejo: Dead White to the mix, we apply our last highlight layer, this time focusing on the most protruding areas, such as the tip of the nose, and the knuckles of the fingers.
The six stages of this process are pictured below.
Next, we move on to the facial details — the eyes and the mouth.
Facial Details
I paint the eyes in the same way as I would on Dwarfs (or Humans). The aim is to paint a black oval shape, then paint a white oval shape inside, leaving a black outline and finally painting a vertical oval in the middle, all on a very small surface.
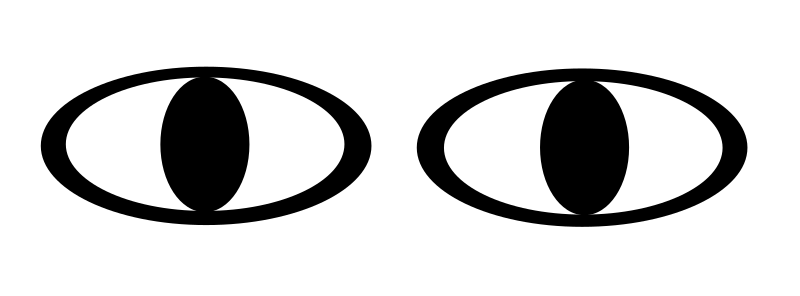
Because of the small surface, I use my Winsor & Newton Series 7 “Miniature” brushes (Size 0 for the eye shape, and a size 000 for the pupil). These are brushes I accidentally bought as a kid, back in the early 00’s, thinking that the “Miniature” series would be ideal for painting miniatures. They are not, because they are way too small for holding any amount of paint, but for these tiny details, they come in handy.
The Winsor & Newton Series 7 are my brushes of choice for all detail work, with the Size 0, 00, and 000 seeing equal amounts of use. Don’t make the mistake of buying the “Miniature” series brushes, as they are very, very short and almost don’t hold any paint (unless you want to use them for painting eyes).
Below you can see the three stages for painting the eyes using Vallejo: Black for the outline, Vallejo: Dead White for the white of the eye, and Vallejo: Black again for the pupil.
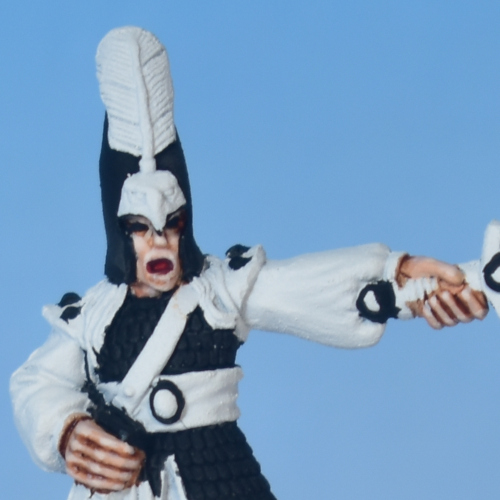
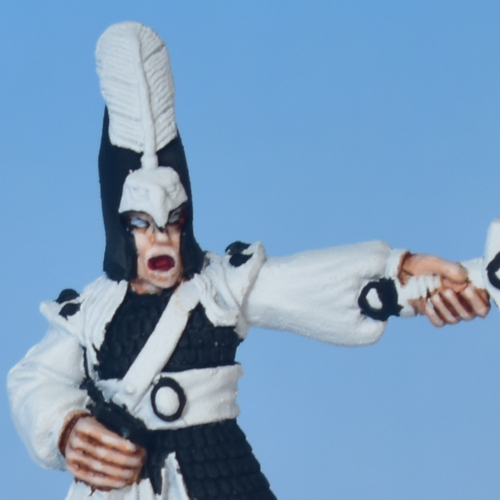
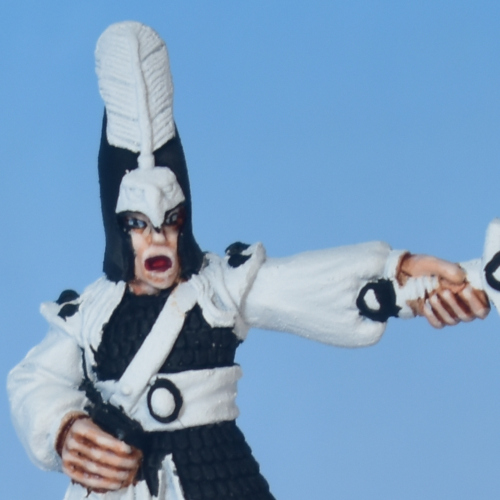
Make sure to come in from the left and right side when painting the shape of the eyes, and try to approach from the bottom, or front when painting the pupil. If he ends up looking cross-eyed, or otherwise a bit funny, just try again. A success rate of 33% is pretty good!
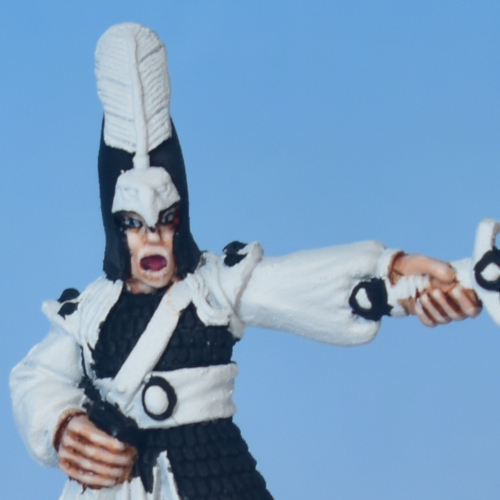
Finally, this elf is shouting something and there is a bit of tongue sculpted inside his mouth. This is highlighted in two stages, first using pure Citadel: Pink Horror, and then mixing in some white for the second highlight.
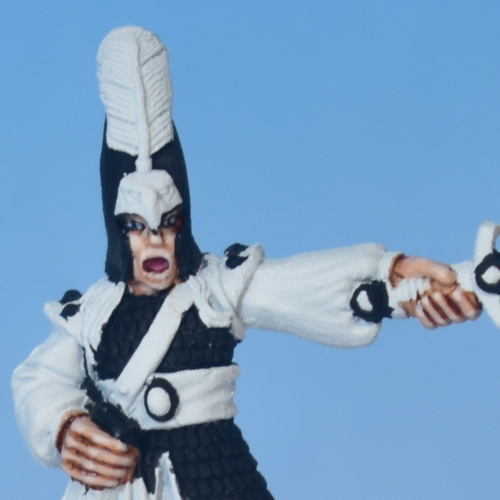
White Robes
A defining feature of almost every High Elf model is their pristine white robes. White is often considered a difficult colour to paint, and there are various ways to approach shading white. A “dirty” white look can be achieved by shading with an off-white (beige), and a cold white cloth can be painted by shading with a light grey. For High Elves though, the most obvious choice is to shade with a light blue colour, which results in a “clean” and softer look (like you see in washing detergent commercials, just what we’re looking for).
In this case we work using a colour gradient from Citadel: Blue Horror to Vallejo: Dead White. On this particular robe, since the folds are not too deep, we start with a shade that is quite light. If the folds were more pronounced, we could start with a darker colour.
Here are the four steps that I followed, and the corresponding images. As you can see, the differences between stages are very subtle, and sometimes even a little lost in the process of photography.
Stage 1. Apply a base coat of the darkest shade colour, a 50/50 mix of Blue Horror and White.
Stage 2. Add a little more white and apply a first highlight layer, covering all but the deepest recesses.
Stage 3. Add more white to the mixture again, and apply a second highlight layer focusing on the folds.
Stage 4. As a final highlight, use pure Vallejo: Dead White.
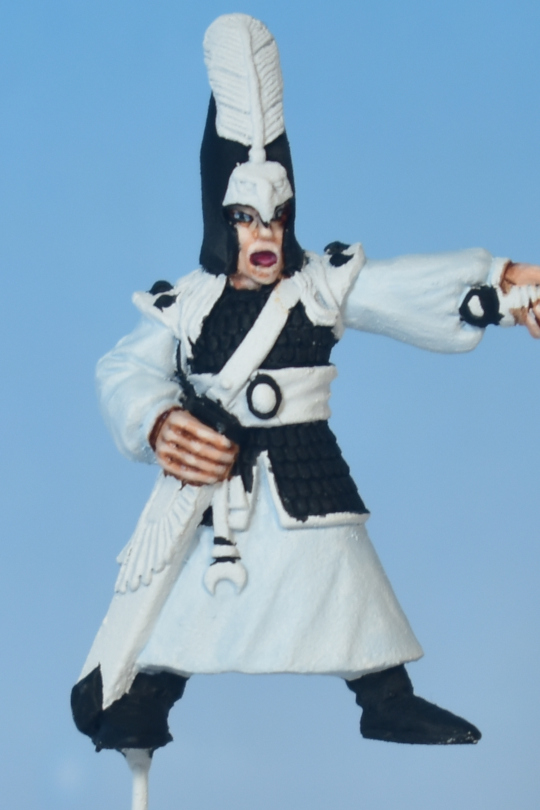
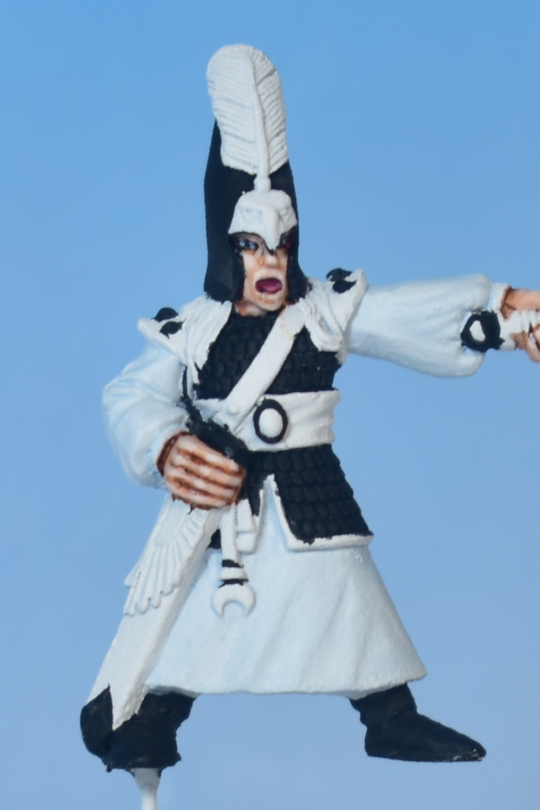
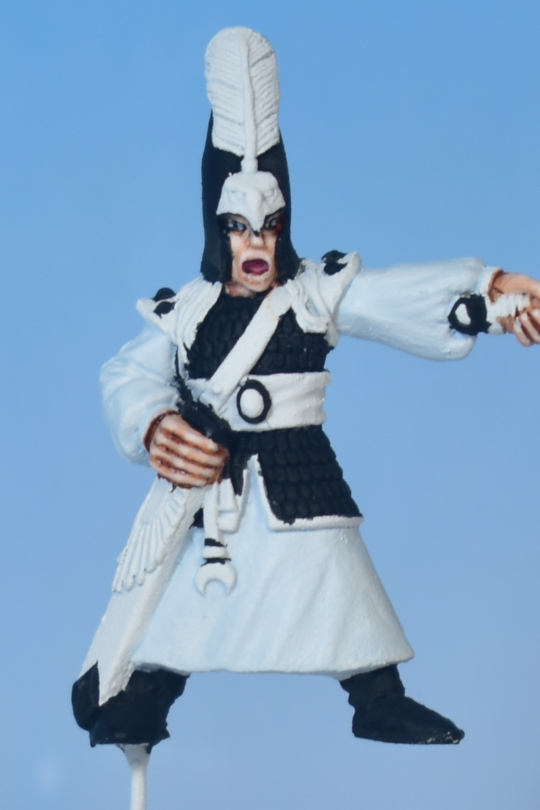
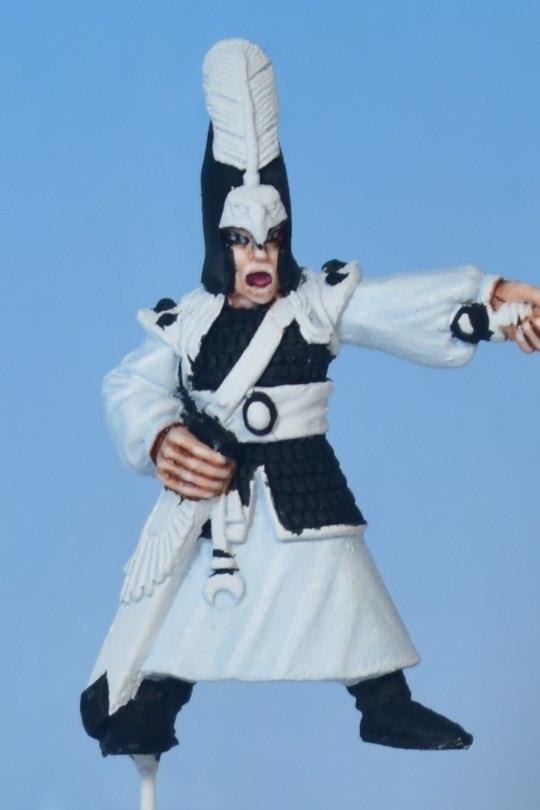
Instead of following these stages strictly, you could simply create a gradient from Blue Horror to pure white on your wet palette, and paint more “freely” until you are happy with the result.
Silver Metallics
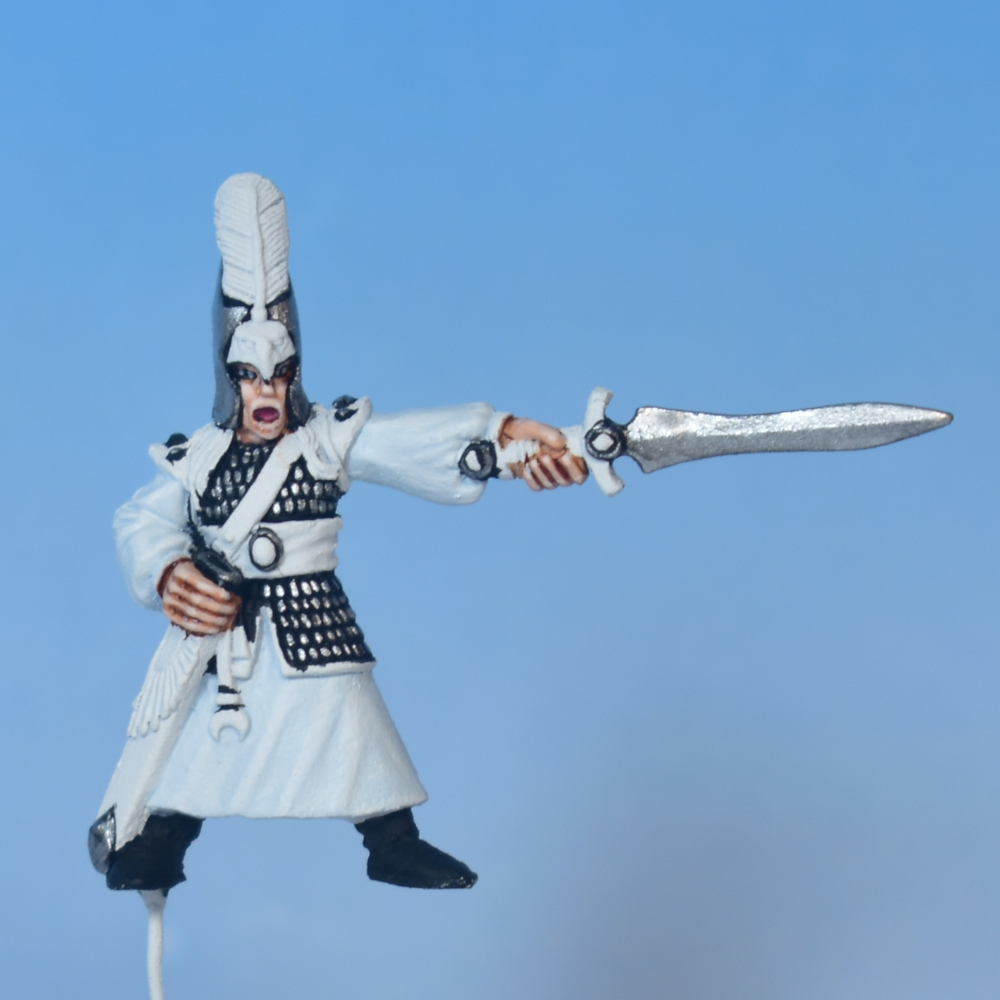
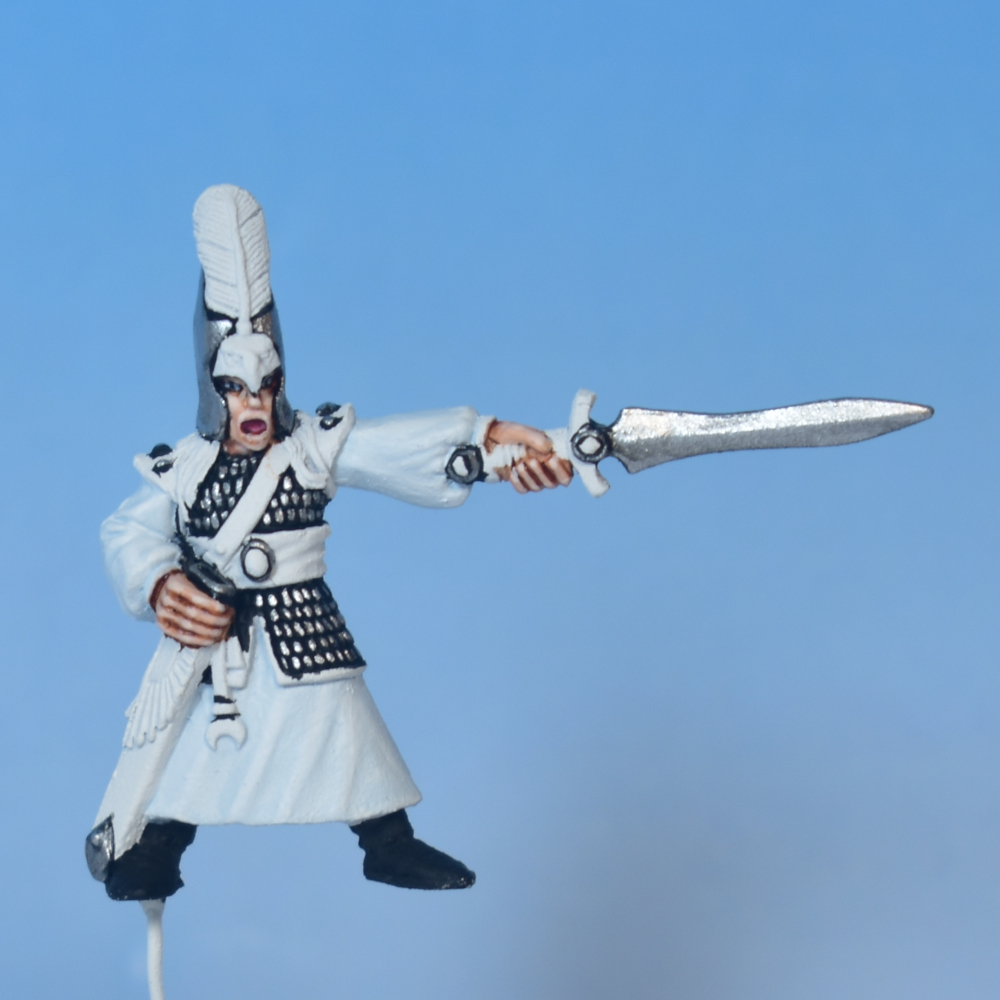
Another common recurring element on all High Elf miniatures is bright silver metallics, such as scale mails, tall helmets and of course, weapons. In the undercoat stage we have already prepared our work, by painting all metallic areas black. This is important because silver or steel coloured metallics cover much better over black, and deliver a much more “shiny” result. In this first step of the process, we use Citadel: Runefang Steel. I start by using the paint without thinning with water to paint the individual scales on the armour, and other smaller details like the metallic rings around the gemstones.
Generally speaking, paints should be thinned with water (including metallics), but thinner paint is more likely to run in the gaps between the individual scales. In any case, if you make a mistake, you can simply correct with a thin line of black.
For the larger areas, such as the helmet and the sword, we can thin our metallic paint as usual and apply two thin layers to get the best coverage. Leave a thin black line around the edges of the helmet to help define the shape.
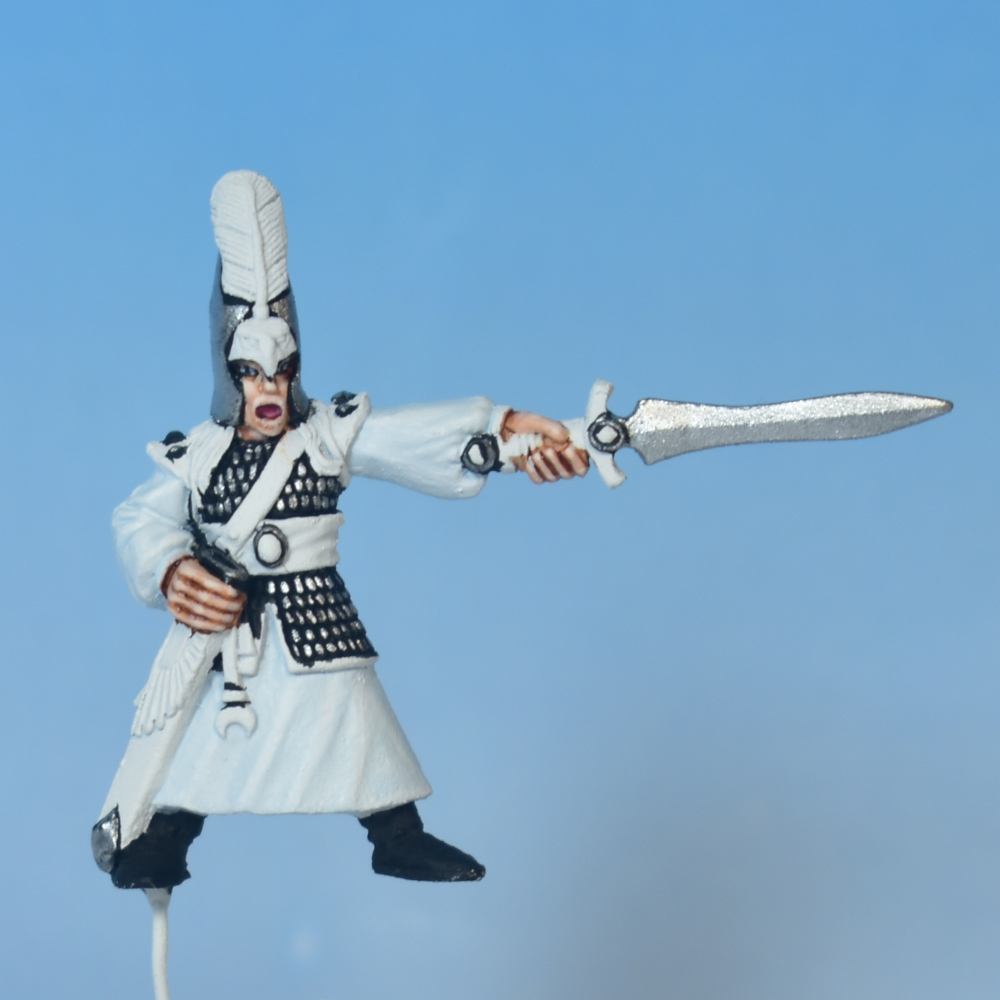
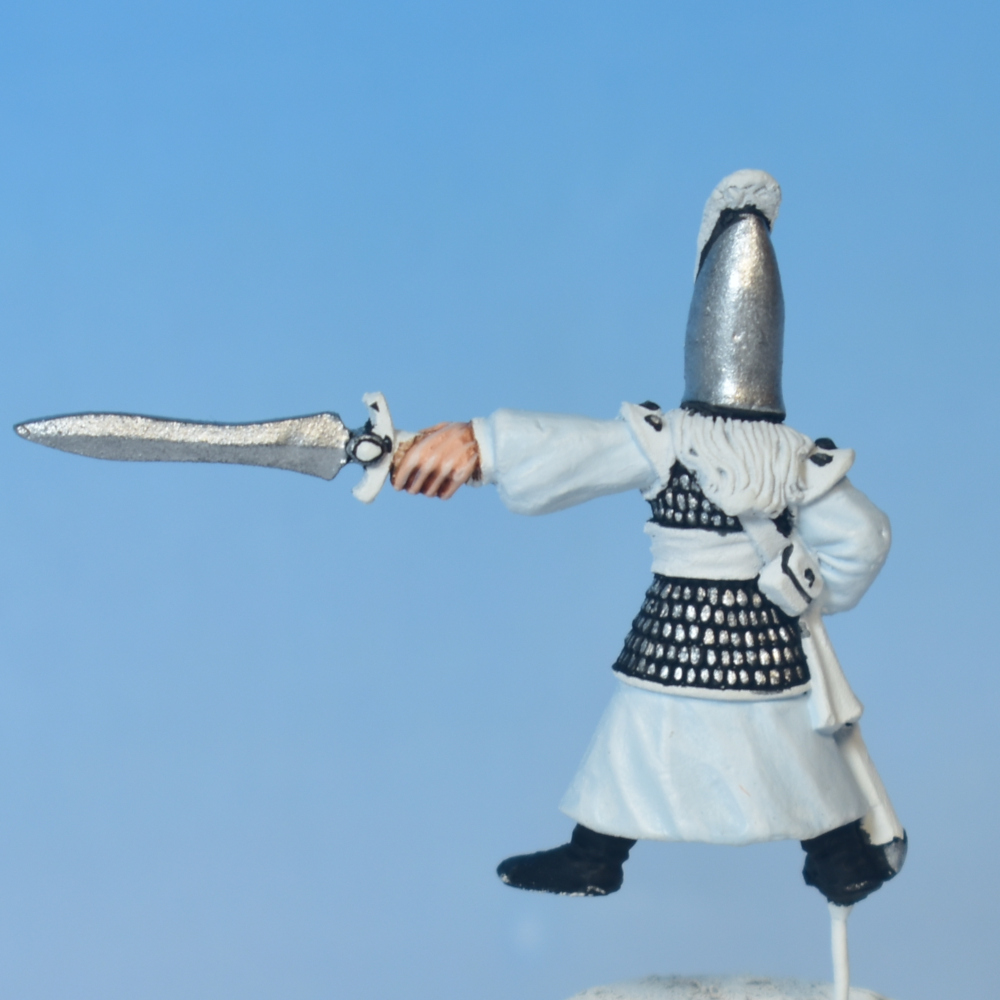
In the next stage, we apply some subtle shading to the larger metallic parts, such as the helmet, the sword and the bottom part of the scabbard. Mix Citadel: Nuln Oil with water in a 1:1 ratio on your wet palette and apply it to the blade, helmet, and scabbard, making sure to darken the recessed areas. When painting each individual scale of the armour with the base metallic paint, you don’t need to do additional shading on the scale mail.
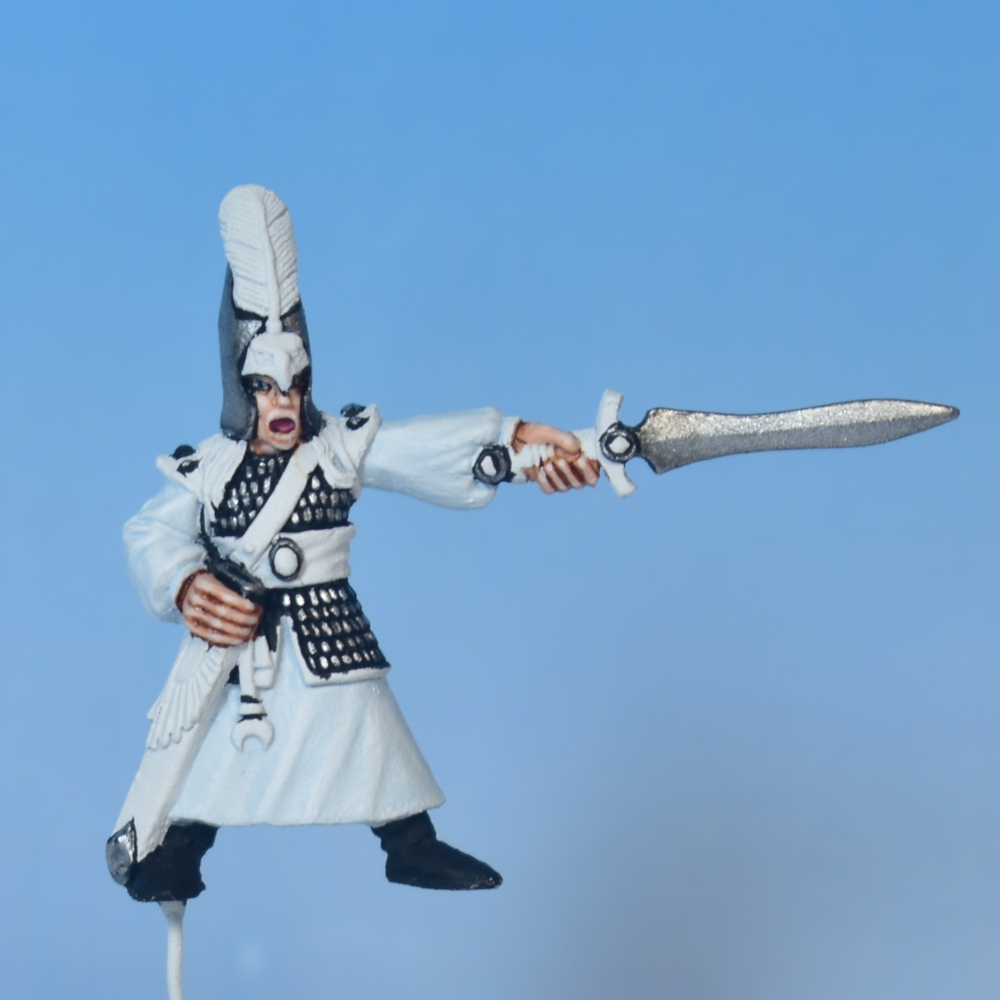
Next, we apply two layers of highlights. The first highlight is again using Citadel: Runefang Steel to bring back the shine on the areas that were previously treated with wash (i.e. the helmet and sword).
Mix the paint with water and glaze over areas that would naturally catch light, while leaving some of the lower areas a little darker. Finally, we take Citadel: Stormhost Silver for the final highlights. On the sword we apply an edge highlight to the edges and the tip. On the scale mail, we randomly highlight about 1/3 of the scales, to provide a glimmering effect.
At this stage you can also provide a subtle edge highlight on the metal rings surrounding the gems, and the metallic parts of the scabbard. For the helmet we mix the paint with water and glaze over the areas that would catch the most light.
Deep Blue
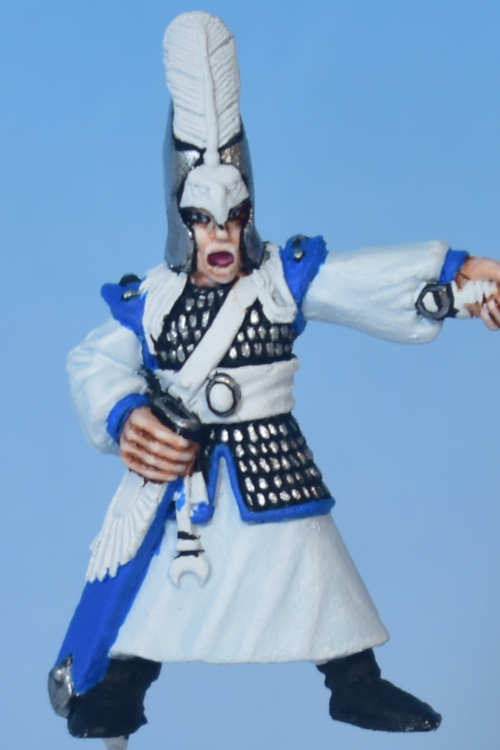
The last of the “defining colours” for most High Elf paint jobs is a deep, vibrant blue that can be used for many different details and decorations on the model. Following our reference image from Mike McVey, we apply this colour to the decorative trim and straps of the armour, as well as the sword scabbard.
Stage 1. Apply a base coat of Citadel: Teclis Blue.
Stage 2. Apply an unthinned layer of Citadel: Drakenhof Nightshade.
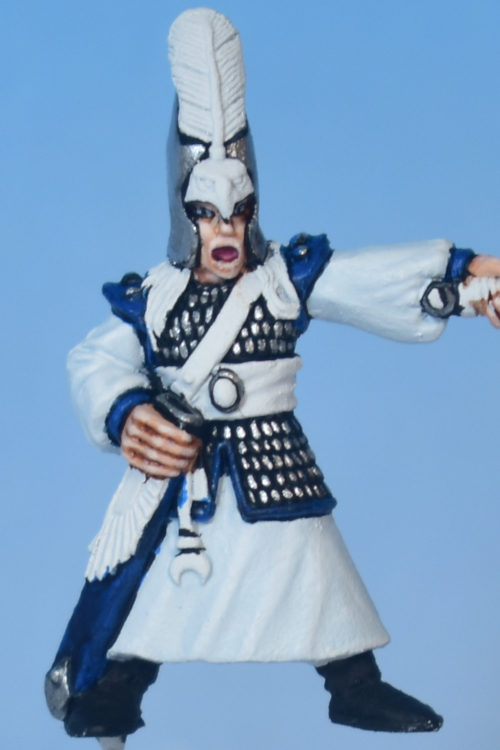
Now it’s time to bring back some brightness and vibrancy to the blue in the following three steps.
Stage 3. Re-base the surfaces using Citadel: Teclis Blue, making sure to keep the edges darker.
Stage 4. Apply a first layer of highlights by adding a little bit of Citadel: Blue Horror to the Teclis Blue.
Stage 5. Adding more Blue Horror we create a much brighter colour to do a final edge highlight. You can choose to add some tiny dots on the most extreme corners with almost pure Blue Horror.
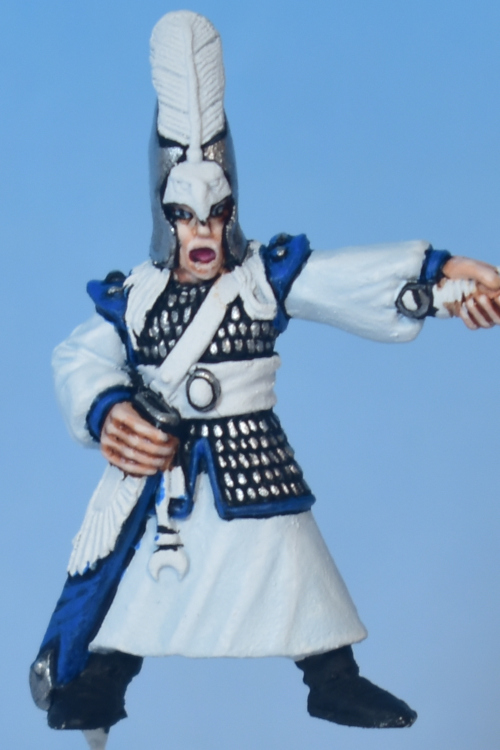
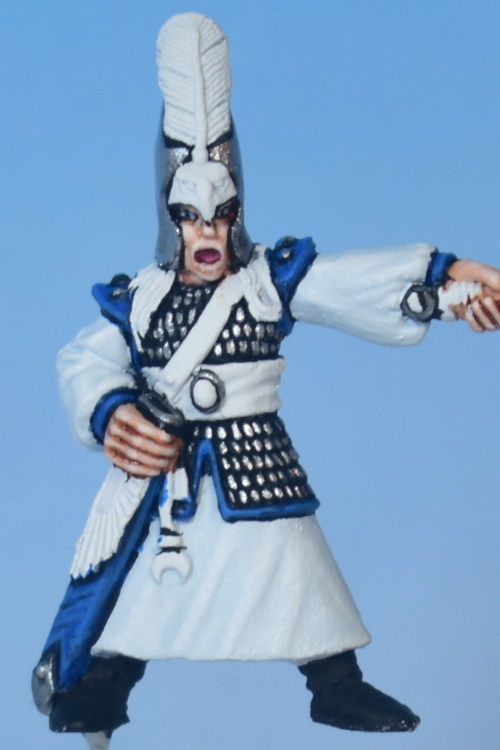
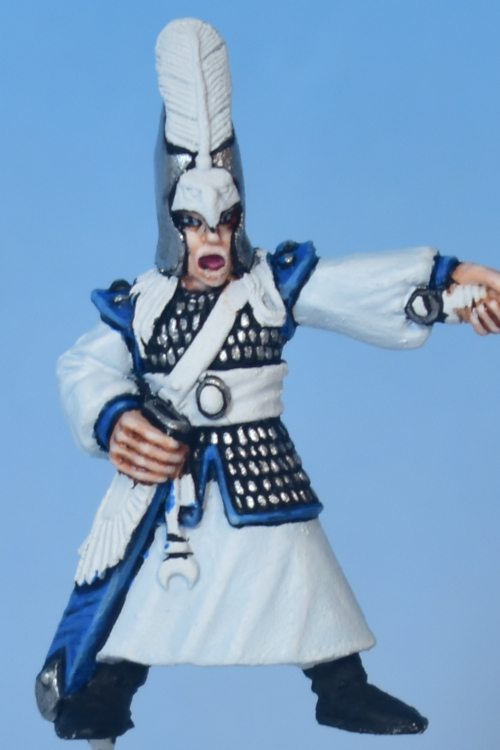
Instead of applying the base coat and then the wash you could simply use a darker base coat colour and skip the wash. This could make your life easier, as applying the wash so closely to the white cloth areas is risky, but I find that — if applied carefully — the wash can really help “find” and define the edges between the blue and white on the model. Additionally, the base coat and wash method would provide a better starting point if you want to apply this blue colour scheme on things like cloth, capes or wavy ribbons.
Pink
At this stage I’m diverting a bit from Mike McVey’s reference material, as I’m not a big fan of the yellow details on High Elves. Instead, I take some inspiration from Nils Anderssen‘s recent Golden Demon entry that won Bronze in the Warhammer: The Old World category with a great colour scheme of gold, blue, pink, and jade. Looking at Golden Demon entries can be bad for your feelings of self-worth as a painter, but we can also learn and draw inspiration from them, even if we could never reach the level of execution.
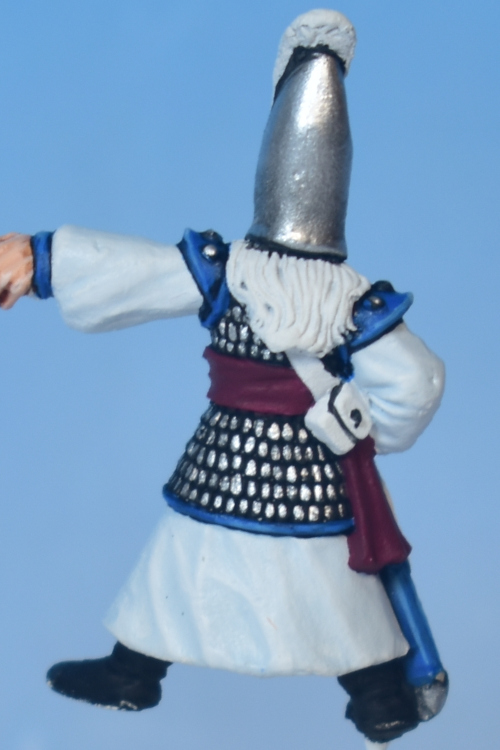
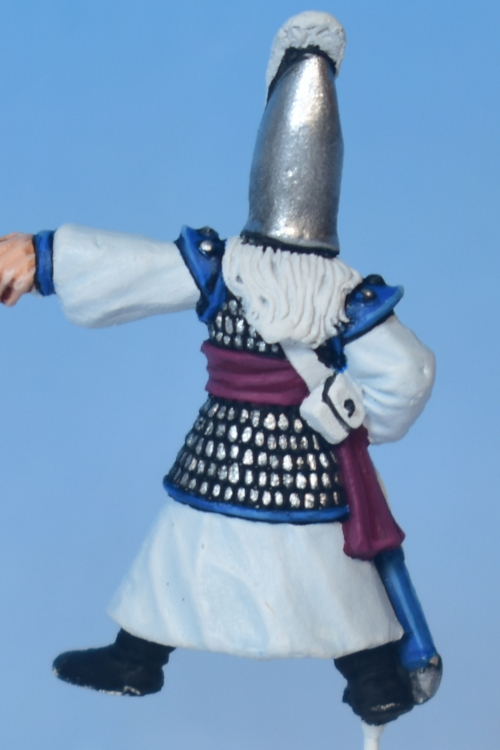
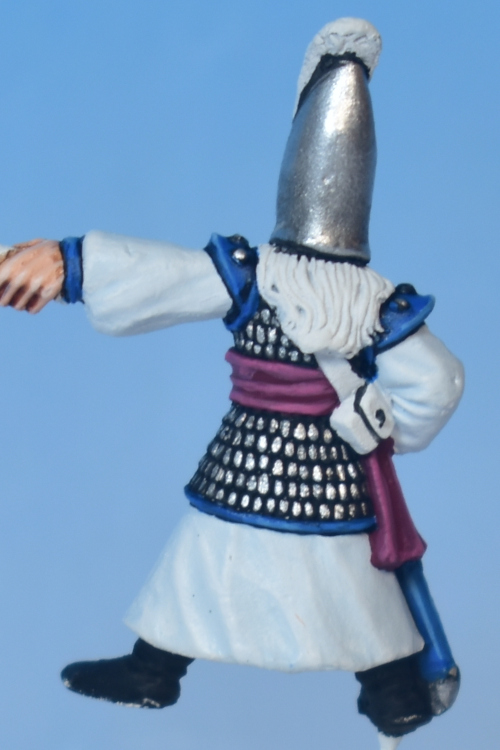
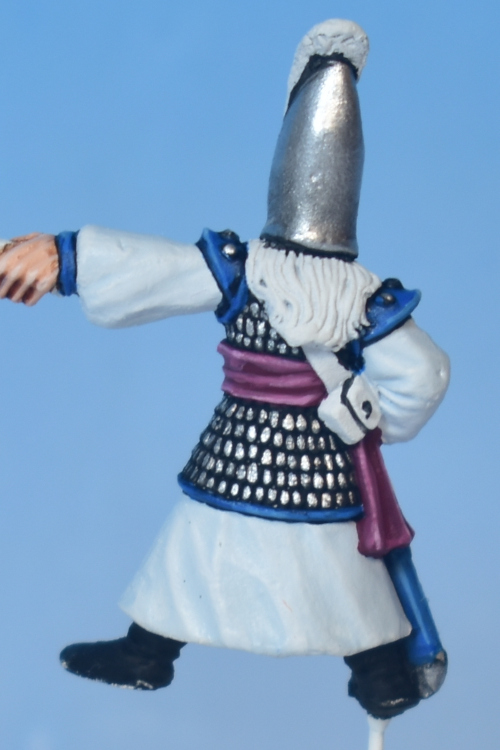
With that said, here is my attempt at a simple colour scheme for a nice purple/pink sash.
Stage 1. Apply a base coat of Citadel: Screamer Pink.
Stage 2. Create a 1:1 mixture of Citadel: Emperor’s Children and Screamer Pink and apply a first layer of highlights, hitting all but the deepest folds.
Stage 3. Use pure Emperor’s Children to apply a second layer of highlights.
Stage 4. Mix in some Vallejo: Dead White into the Emperor’s Children and apply a final edge highlight. Add even more white to the mix to create some final dots on the most protruding corners.
Below you can see images for the four stages.
Intermezzo…
As you may have noticed we are painting the different elements of the model starting from the inner layers (the skin), and moving upward in layers. Over the skin there is the white robe, over the white robe there is the armour, and over the armour there is the sash, etc… This is good practice to do, because in this way you’re the least likely to accidentally hit an area with paint that has already been painted. You are much more likely to touch the helmet when painting the face, than the other way around.
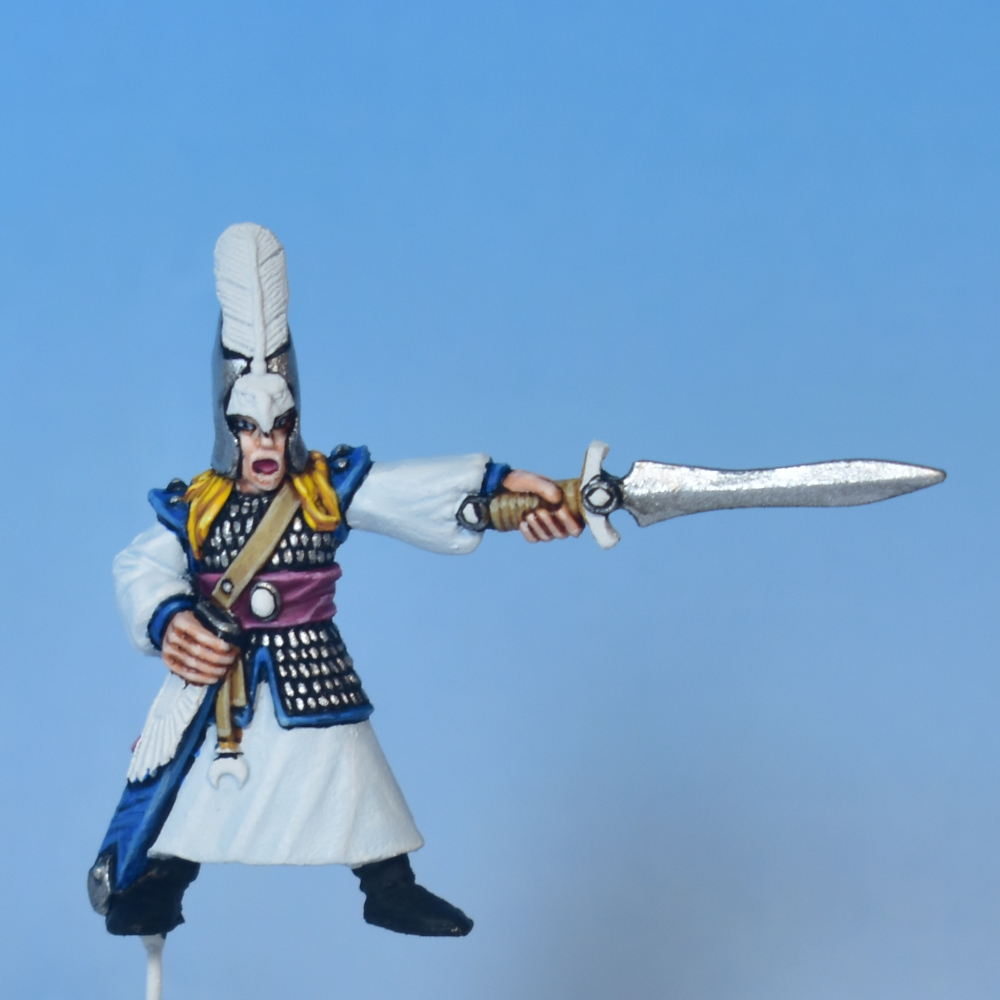
In any case, the next two layers are the belt, which is done using Morghast Bone for the base, Seraphim Sepia for the Shade, re-based with Morghast Bone and then edge highlighted with Screaming Skull. After that, I painted the hair in the “Golden Blond” colour scheme that you can see in my Painting Dwarf Beards tutorial. With those two layers done, it’s time for the final bits…
Jade
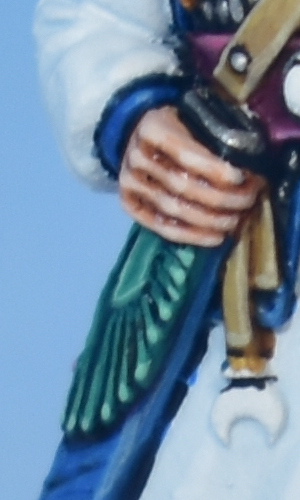
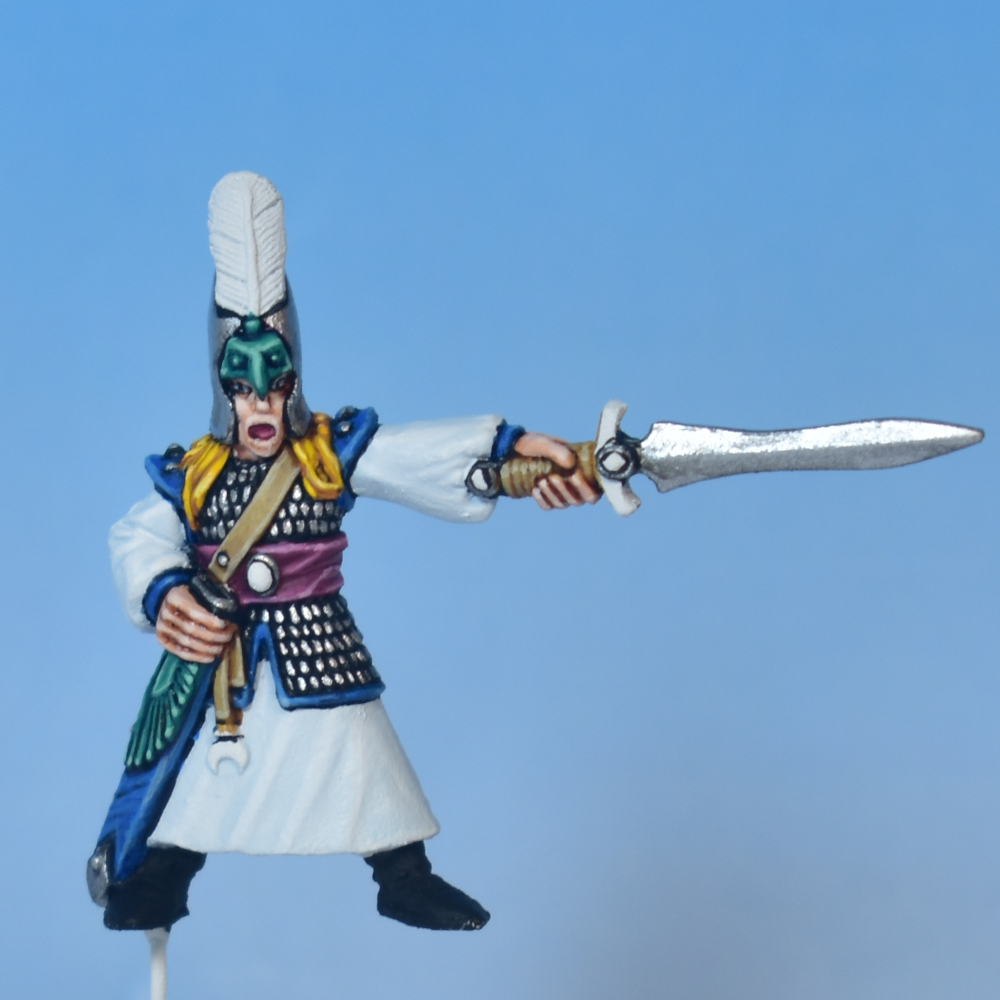
The decorations on the sword scabbard and the eagle on the helmet are painted in a “Jade” colour scheme with the following steps.
Stage 1. Base coat of Vallejo: Jade Green.
Stage 2. Shade using Citadel: Druchii Violet.
Stage 3. Re-base using Vallejo: Jade Green.
Stage 4. Highlight using Vallejo: Foul Green.
Stage 5. Highlight using Vallejo: Ghost Green.
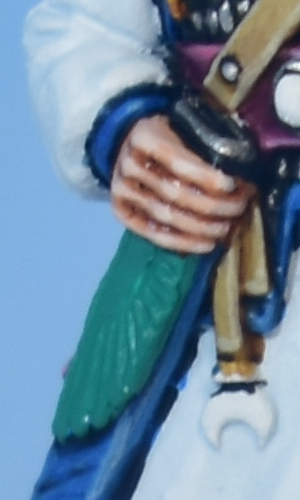
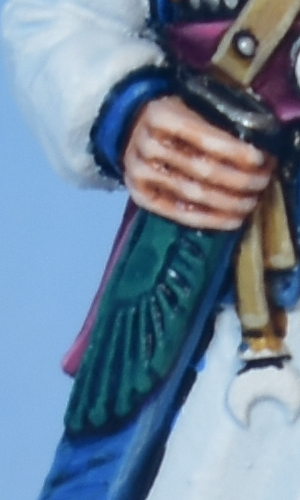
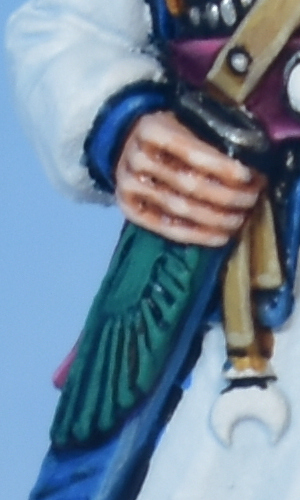
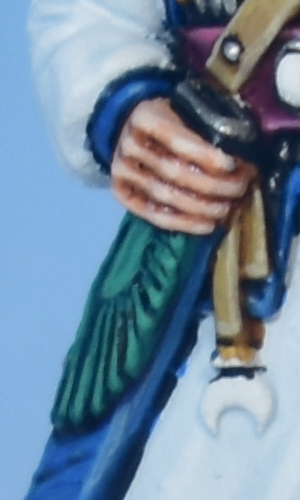
The same steps are repeated on the Eagle decoration on the helm, leading to the following.
Gold, Feather, Gems, and Boots
Next up, some small gold details are painted in a familiar colour scheme, starting with Citadel: Gehenna’s Gold, shading with Citadel: Reikland Fleshshade, and then highlighting with Gehenna’s Gold and Vallejo: Polished Gold (recipe courtesy of Anvil of Doom Miniatures).
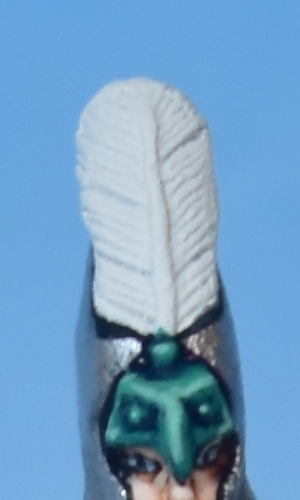
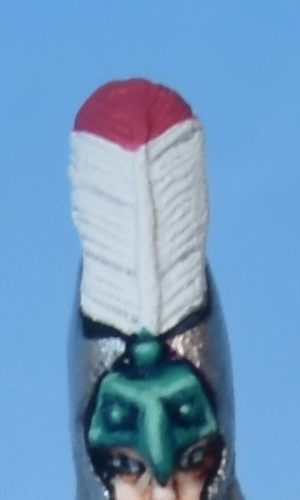
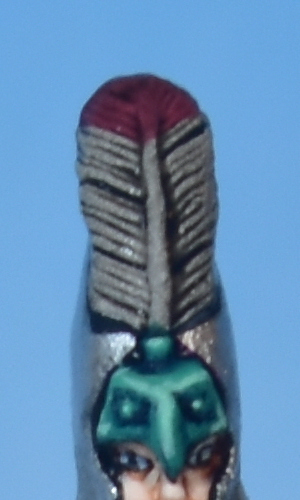
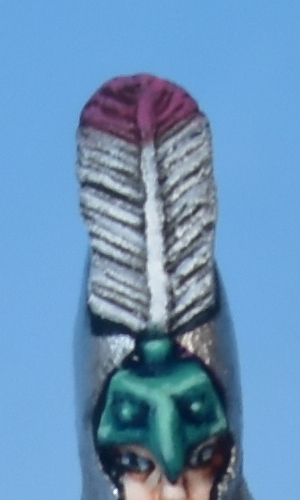
Then, for the feather, we first paint the tip decoration using Citadel: Pink Horror (which is similar to the mid tone of our pink sash). Then, the whole feather is washed using Citadel: Nuln Oil. The white part of the feather is highlighted using Vallejo: Dead White, while the pink part is highlighted using Citadel: Emperor’s Children (both using a mix of dry-brushing and painting thin lines).
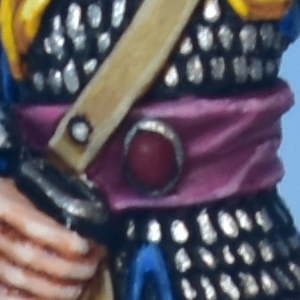
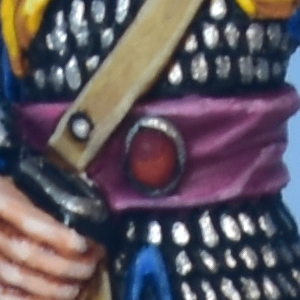
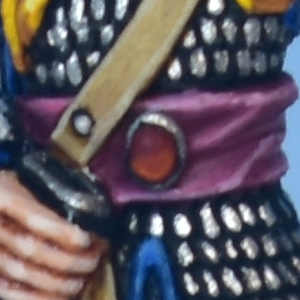
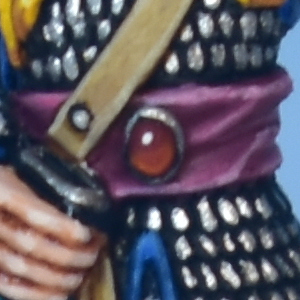
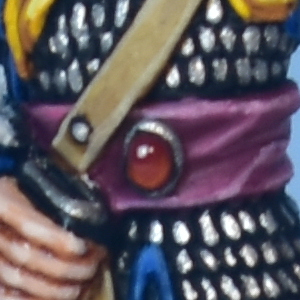
A final iconic High Elf element is the ever present gemstones. There are plenty of tutorials on the internet explaining the idea behind this: a dark base, a bottom gradient reflection and a white dot. Here, I use Citadel: Khorne Red as the base colour. Then, I mix in Vallejo: Orange Fire to create a nice mid-tone red colour, and use this to paint the bottom half of the gem. Then, I add a thin line of pure Vallejo: Orange Fire at the bottom of the gem, and apply a dot of Vallejo: Dead White at the top left corner. The final stage is to add a layer of Vallejo: Polyurethane Gloss Varnish, which gives the gem some actual shine.
And finally, I use Citadel: Skavenblight Dinge to draw some thin highlights on the boots (again, keep this simple as it shouldn’t draw the eye).
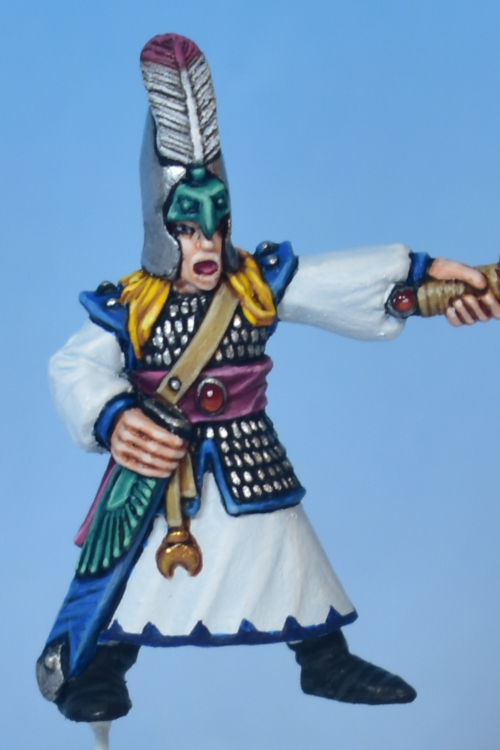
Patterns and Decoration
And finally, for the grand finale… let’s try to follow the 1993 painting guide and paint some patterns on the robe. Let’s see what the guide says:
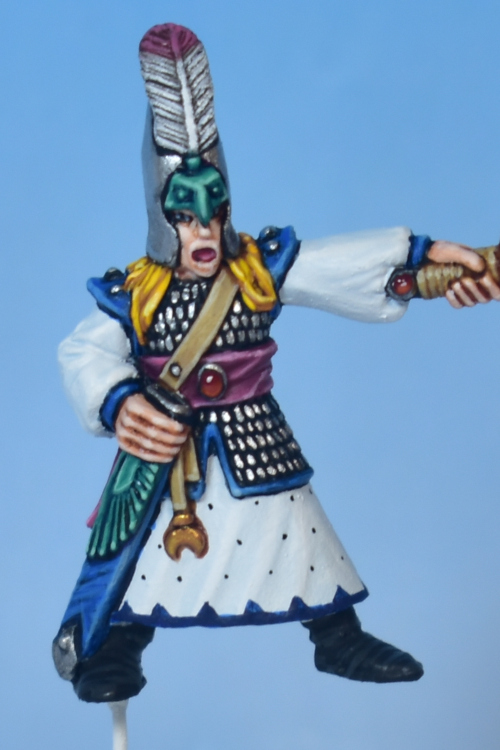
“The border was first painted on as a simple line and then small triangles were added. Tiny dots of paint were used to mark out where the diamonds were going to go. These are not too hard to paint, as the tip of a good brush naturally forms into a triangle. Paint the top of the triangle first and then turn the model upside down and paint the bottom.“
Right, here goes…
I use Citadel: Kantor Blue, as it is similar to the darkest shade colour used for the rest of the blue areas.
The line at the bottom and the small triangles are then painted on, evenly spacing out the triangles.
As the next step, I used a Micron pen (Size 1) to make the tiny dots marking out the positions of the diamonds.
And finally, drawing the diamonds (“not too hard…“, yeah right…). This was actually incredibly difficult to do, and no two diamonds ended up being the same size. Still, as an overall pattern at arms length, I’m pretty happy with the result…
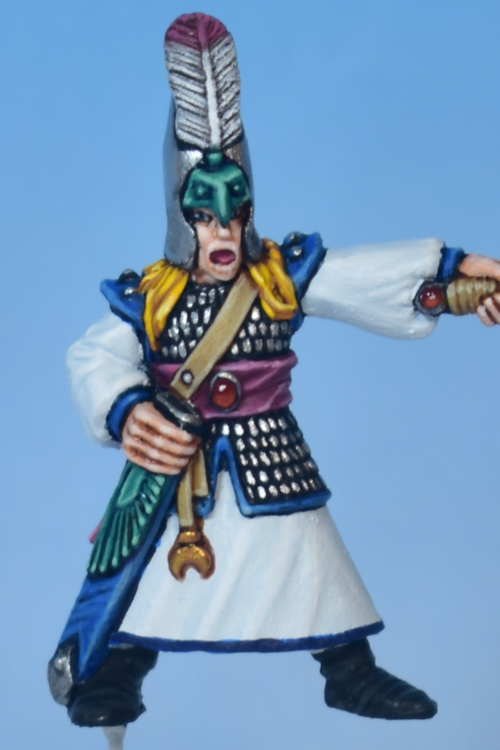
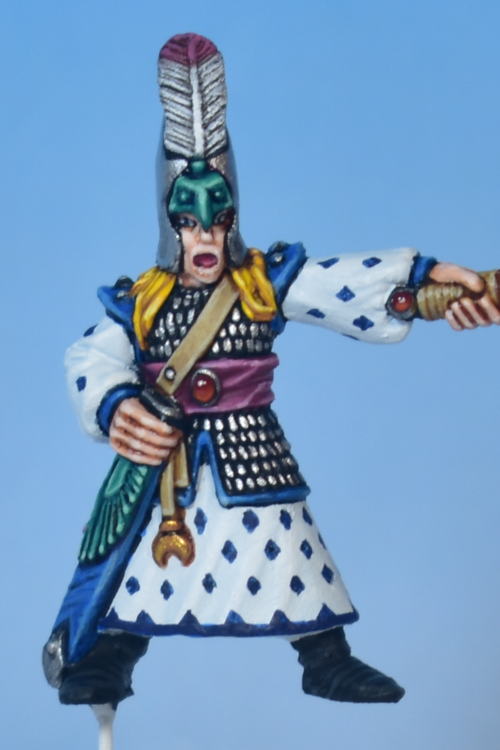
Time for a final reveal shot.
The Result
And here is the final result, hope you like it!
Closing Words…
If you have any question, feel free to leave a comment below, or drop me an email at harm@harmsworkshop.com. If you found this very useful and want to show some support, you can do so via my Ko-Fi page.