

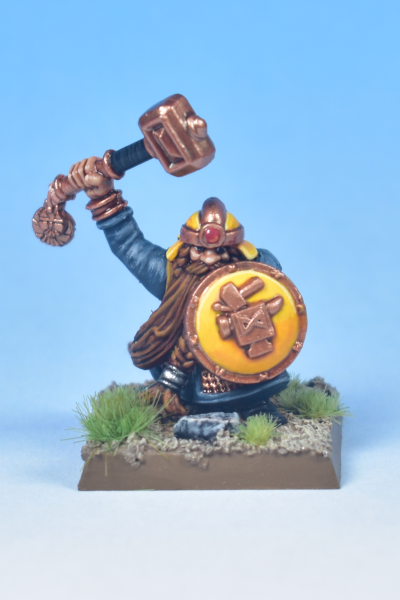
In this step by step tutorial I will show you how I painted my Dwarf Warriors using a “homebrew” colour scheme with Copper, Dark Blue and Yellow as the main elements. The bright yellow makes the unit stand out on the battlefield, and the colour scheme is simple enough to get a decent block of 20 on the table relative quickly.
The starting point will be a white undercoat, and having already painted the base (the steps for which you can find in the tutorial “Basing for Warhammer The Old World“).
Whenever possible, I try to do all steps that involve dry brushing first so I don’t have to worry about accidentally hitting areas that I already painted.

Copper Metallics
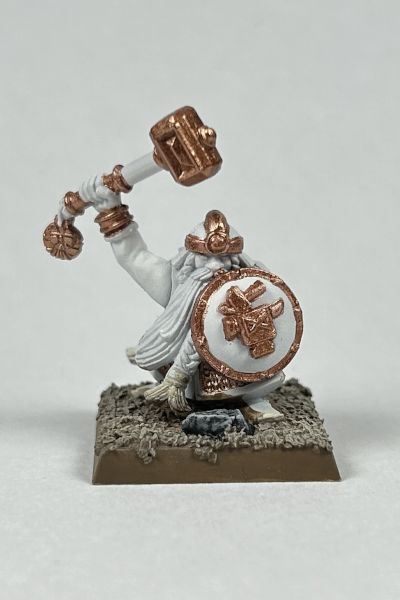
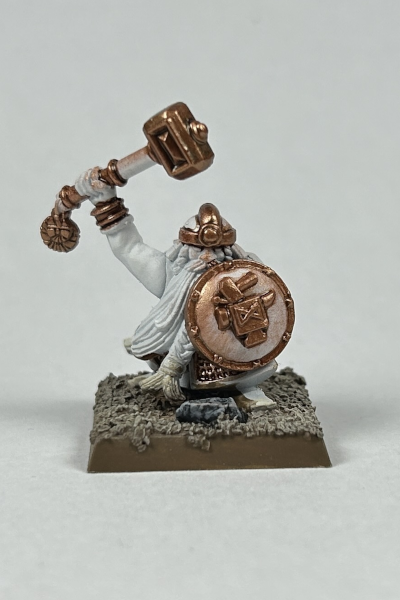
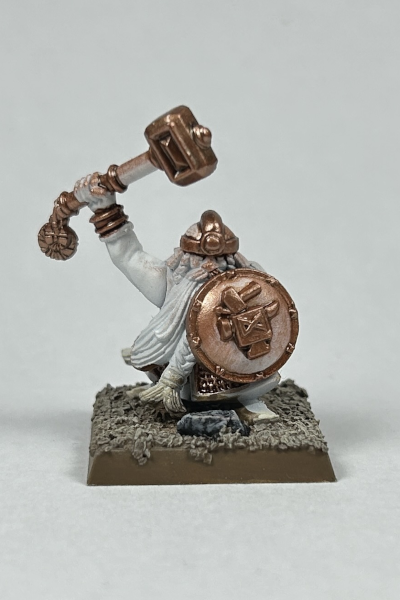
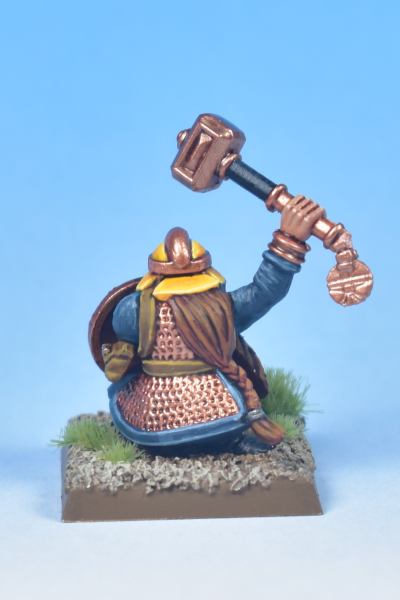
As we will also use dry brushing for the Copper areas, let’s tackle this first. Start by base coating all metal areas using Vallejo Model Air: Copper (71.068). This includes the chain mail, the weapon, the helmet and rims of the shield. Next we apply a shade of Citadel: Reikland Fleshshade (unthinned, straight from the pot). After this wash has fully dried, we will bring back some of the copper shine by using a heavy dry brush of Vallejo Model Air: Copper. Finally, we mix some Vallejo Game Color: Silver into the Copper (creating something like a 50/50 mixture) and do a second dry brush. This time we do a very light coat, and make sure to only make downward brush strokes, so as to only lightly hit the top-facing edges.

Base Coats
Now that we have all our dry brushing done, we can move on to applying the base coats to all the rest of the model. For this, we use the following colours:
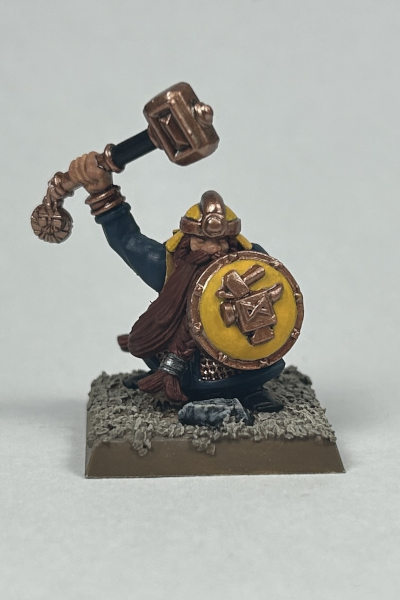
- Citadel: Cadian Fleshtone for the face and hands (don’t forget the hand holding the shield).
- Citadel: Stegadon Scale Green for the majority of the cloth areas.
- Citadel: Yriel Yellow for the shield board, the helmet, and other small details like the flaps of the helmet.
- Vallejo: Leather Brown for the belt, leather straps and leather pouches (mostly on the back of the model).
- Citadel: Abaddon Black for the weapon haft and the boots.
- Citadel: Doombull Brown for the beard (see my “Painting Dwarf Beards” tutorial for other variations).
- Citadel: Zandri Dust in case the model has horns on his helmet (not this guy).
Shade
Next up we apply some washes to get some shading on our model, for this we use the following colours:
- Citadel: Reikland Fleshshade for the skin.
- Citadel: Casandora Yellow for all the yellow parts.
- Citadel: Agrax Earthshade for the light leather parts, as well as the beard.
- Citadel: Seraphim Sepia over the helmet horns (again, not shown on this model).
I apply all washes unthinned and straight from the pot. If you think the shades are too dark, you can always thin them down with some water.
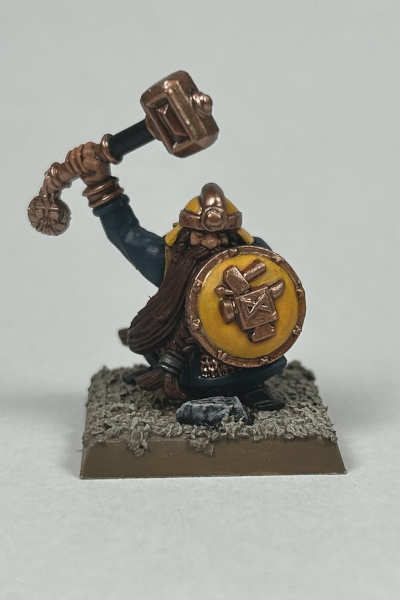
Highlights
Time to highlight everything back up. At this stage, I prefer to fully complete the highlights area by area, so starting with the skin, then moving to the cloth, the beard, etc. In the images below I show you a “stage by stage” of applying a first, a second, and in some cases a third layer of highlights to all areas of the model.
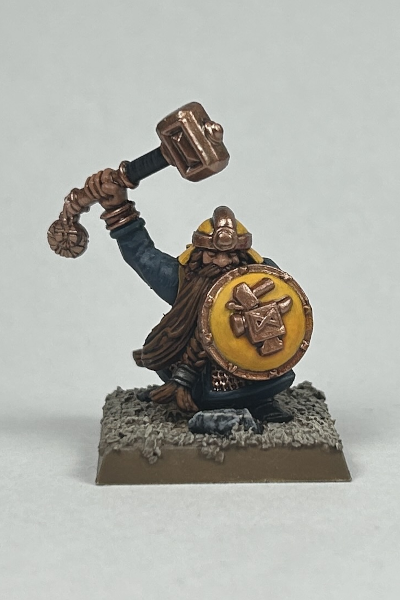

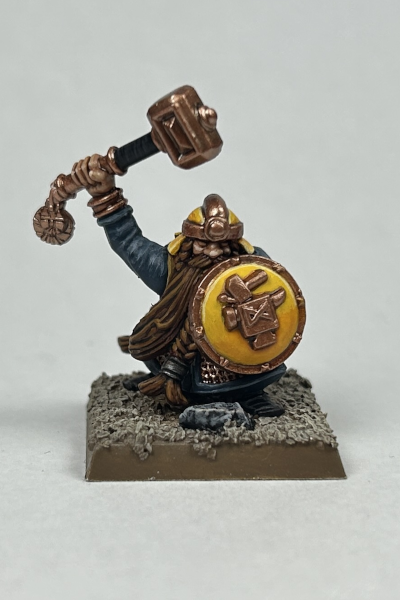
Here are the colours used for each area:
- For the skin, we first highlight using Citadel: Cadian Fleshtone (stage 1), then Citadel: Kislev Flesh (stage 2), and finally a dot highlight of Vallejo: Pale Flesh (stage 3).
- For the cloth, the first highlight is done with Citadel: Thunderhawk Blue (stage 1), and the second highlight using Citadel: Fenrisian Grey (stage 2), nothing is added in the third stage.
- For the yellow parts, a first highlight is applied using Citadel: Yriel Yellow (stage 1), then covering broad edges, and only the top half of the shield using Citadel: Flash Gitz Yellow (stage 2). Finally, an edge highlight is applied using Citadel: Dorn Yellow (stage 3).
- The beard is first highlighted using Citadel: Skrag Brown (stage 1), and then with a mix of Citadel: Skrag Brown and Citadel: Yriel Yellow (stage 2; alternatively you can use Vallejo: Parasite Brown).
- The leathers are highlighted first using Vallejo: Leather Brown, and then with an edge highlight of Vallejo: Plague Brown.
- The black boots and weapon hafts are highlighted using Citadel: Eshin Grey, which is only very slightly visible. Just apply a few thin brushstrokes on the raised areas and call it a day – these are not the most important parts of the miniature.
- If the model has any horns on its helm, highlight it by building up a gradient from Vallejo: Bone White to Vallejo: Dead White.
Wrapping up…
For the final details, we paint his beard-links using some Vallejo: Gunmetal, highlighted with Vallejo: Silver, and the gem on his helmet is painted using Citadel: Mephiston Red, a little line of Citadel: Trollslayer Orange at the bottom, and a dot of Vallejo: Dead White to represent the light reflection.
Then it’s time to wrap up the base by cleaning up the rim with some Citadel: Steel Legion Drab and adding some tufts (check out the full basing tutorial here: “Basing for Warhammer The Old World“)
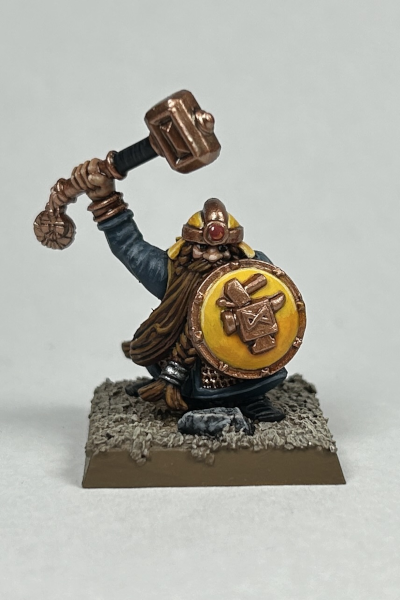
Final Result
That’s one Dwarf Warrior – with Hand Weapon and Shield – ready to join the army!
Closing Words…
If you have any question, feel free to leave a comment below, or drop me an email at harm@harmsworkshop.com. If you found this very useful and want to show some support, you can do so via my Ko-Fi page.
Absolutely legendary tutorial, this has managed to get me over my painting choice paralysis and I’ve got like, half an army painted in 2 weeks.
I’m very happy to hear that! 🙂