
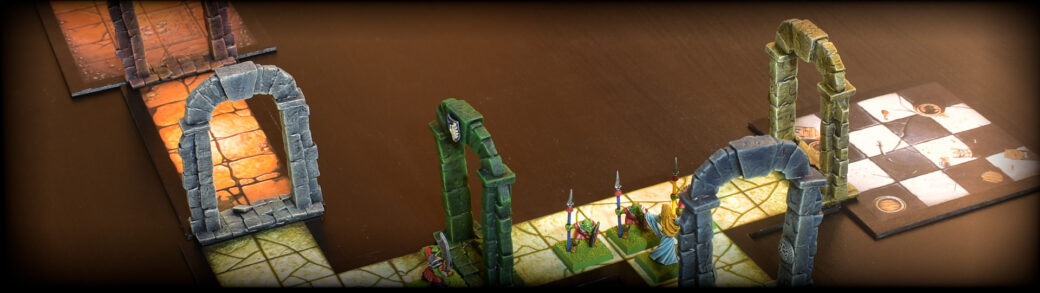
The best thing about Warhammer Quest is the Archways!!! Since Games Workshop unwisely stopped selling the magnificent 1995 version of this game, I will show you how to make your own. In this tutorial I will show you how to scratch-build your own Archways from simple materials and with simple techniques, and I will provide five different colour schemes for adding some colourful variation to your Warhammer Quest ’95 board!
Building the “Connector Bases”
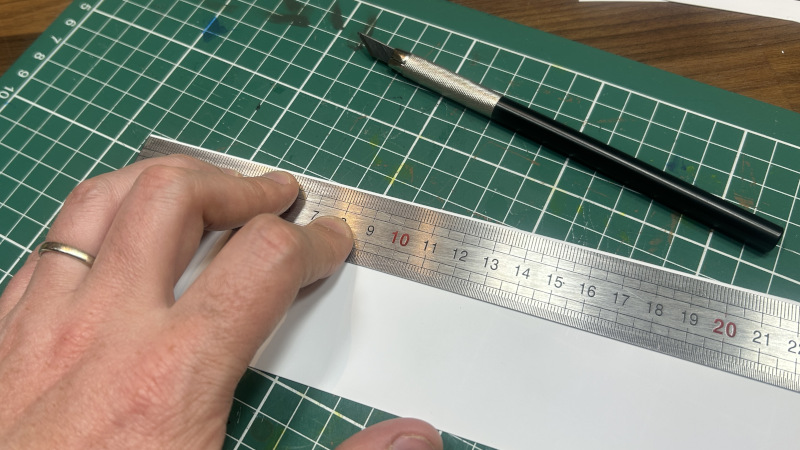
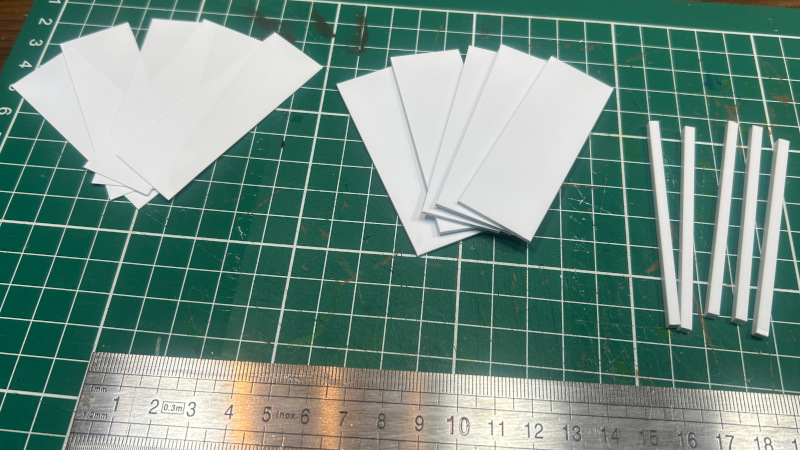
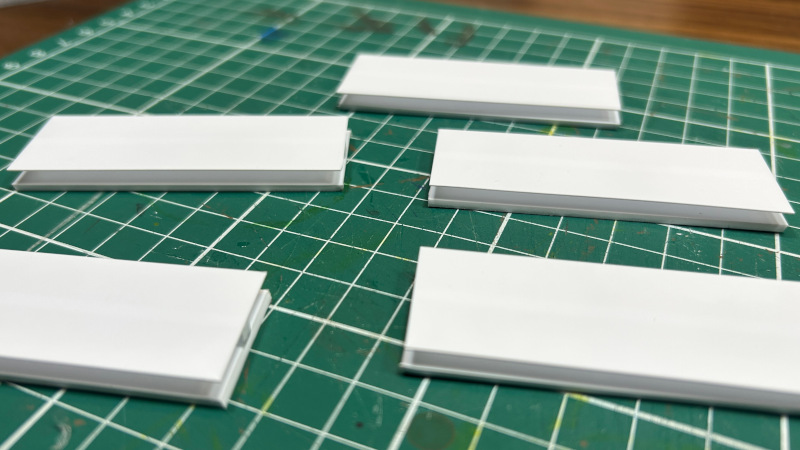
We start by creating the base of our gateways that will serve as connectors between the board pieces. For this I use plastic card. I am cutting out pieces of plastic card of 7cm by 2.4cm. For the bottom of the base, I use 0.4mm thin plastic card, and for the top I use thicker 1.5mm plastic card. Between these two pieces, I use 3.2mm x 3.2mm square plastic strips, cut down to 7cm in length. This 3.2mm works for me, as my board sections are rather thick (paper glued onto cardboard). Make sure you use a size here that works for your particular board sections.
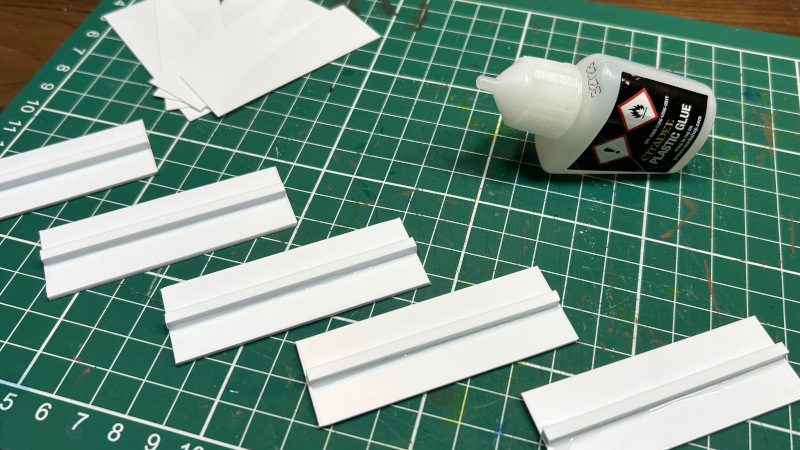
Glue the 7cm long square tube to one of the pieces of plastic card, straight down the middle, using plastic cement. Then, glue the other piece of plastic card on top. These connector bases are then spray painted black.
Building the Pillars
Now we are functionally done, since we can use these little plastic connectors in the game to connect the two board pieces. But they don’t really look like arches yet, so that will be the next phase.
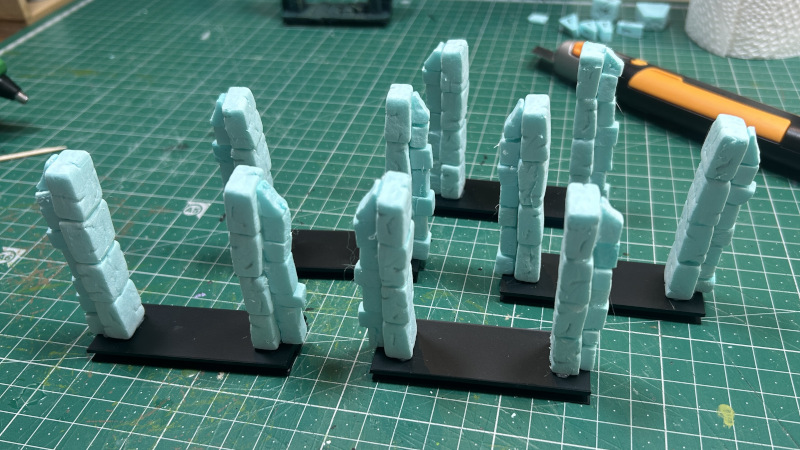
To create the two pillars, we will start by cutting out XPS foam blocks of around 17mm x 12mm x 8mm. Four of these blocks stacked on top of each other will form the base of each pillar.
To make them look less like cut out pieces of foam, and more like old worn stones, we apply two “weathering steps”. First, we take a pencil and draw lots of small cracks into the stones. Do this on all sides, make it varied, and make sure some of the cracks go around the corners. Next, we place all of our foam bricks in a plastic container and throw in some sharp rocks. After shaking the container vigorously for some minutes, the XPS bricks will look like old weathered stone.
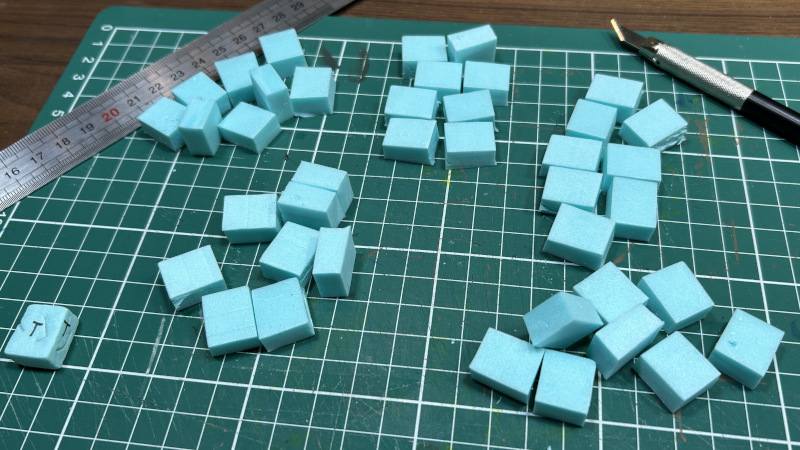
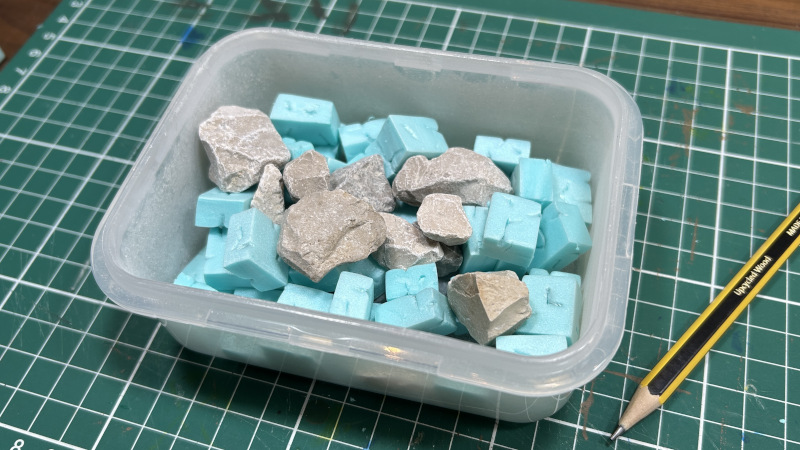
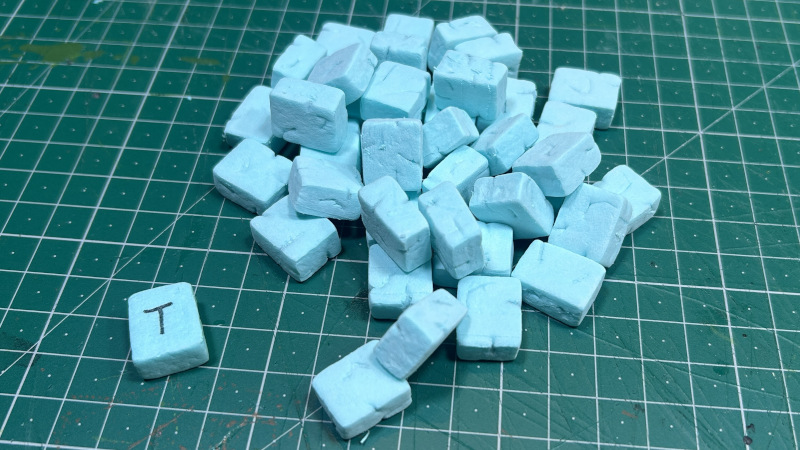
It may be useful to first cut out a “template” block and use this to help cut out the rest of the blocks. This way, you are more likely to cut out blocks that are as much as possible of the same size. I marked my template block with a “T”.
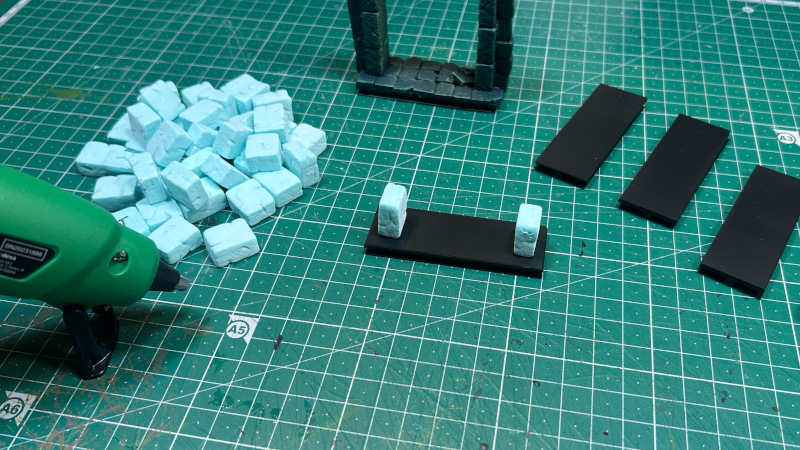
Now it’s time to start building up the main pillars. Make sure you grab sets of 4 blocks for each side that are more or less the same height (it’s unlikely that you managed to cut all your blocks at exactly the same sizes). Using a hot glue gun, we glue the blocks onto the connector bases, leaving just a little space on the outside edges, and then stack the other blocks on top of each other. Even though hot glue is … well, hot — I do recommend wiping away any excess glue that is squeezing out between the blocks. Such glue spills will be hard to cover up later during the painting phase and will simply look like blobs of glue.
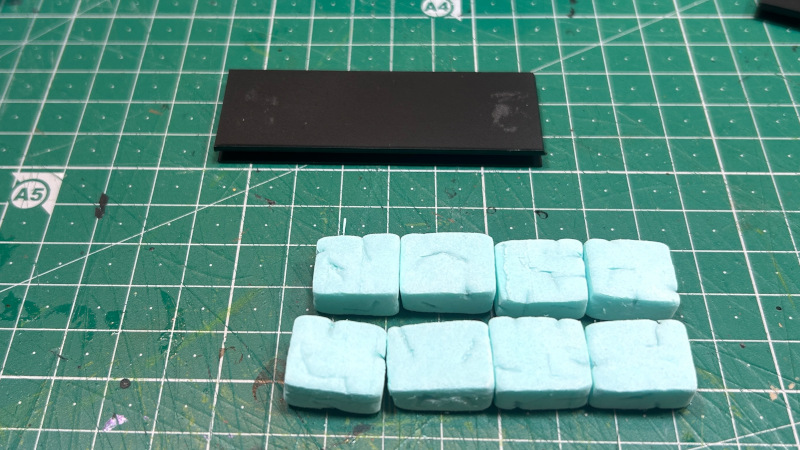
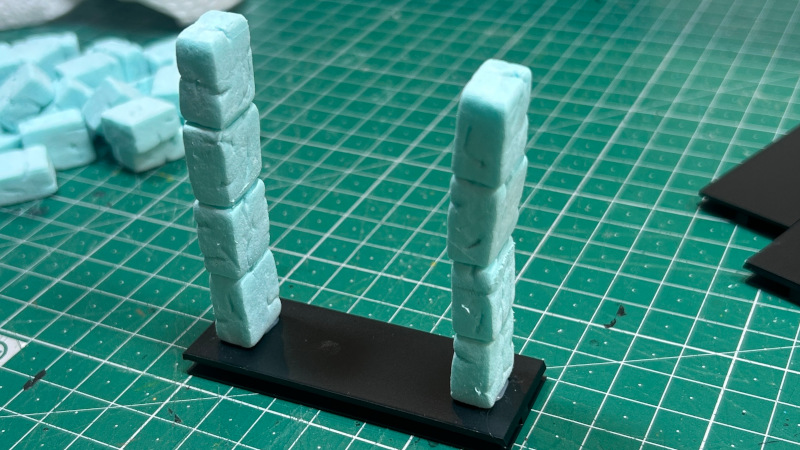
Now that we have the core pillars, it’s time to add a row of smaller blocks on the outside edges. This is following the same style as the original doorways and also adds some strength to the pillars. Cut out a lot of simple “brick” shapes from the XPS foam. Use different shapes and sizes to add some variation, and use the same weathering steps as explained above to make them look like old stone. The only requirement here is that they are about half as wide as the core pillar blocks. Glue them to the side of the pillars and make sure the top brick has a little wedge cut off.
Building the Arches
Next is to build up the arches to connect the two pillars. My XPS-foam cutting skills are not at the level that I can replicate the “winged arches” that you can see on the original Warhammer Quest gates, so we are going for something a little simpler — a flat arch with a big keystone.
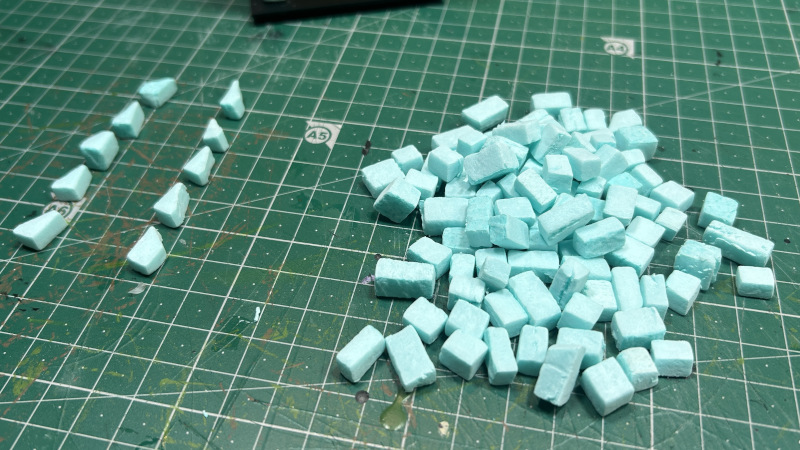
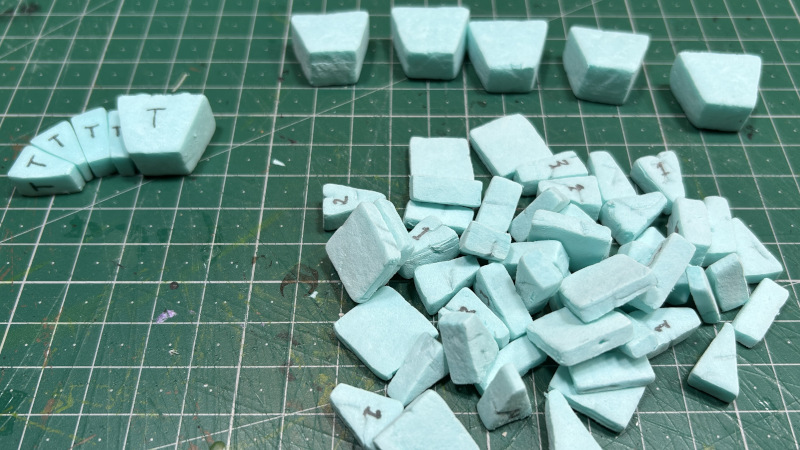
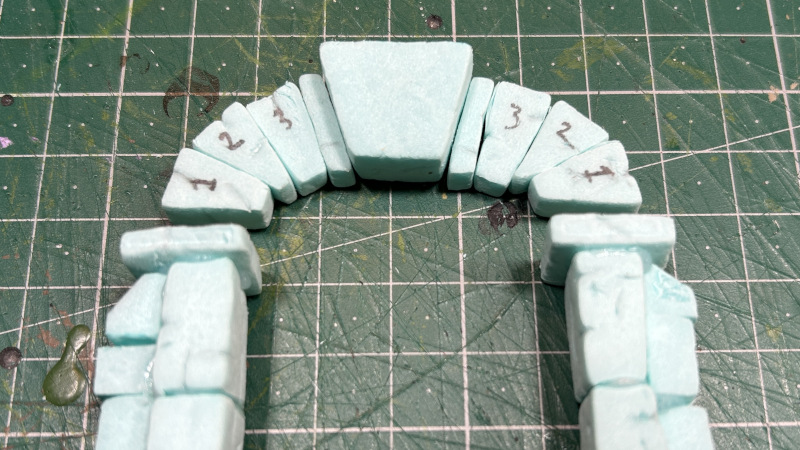
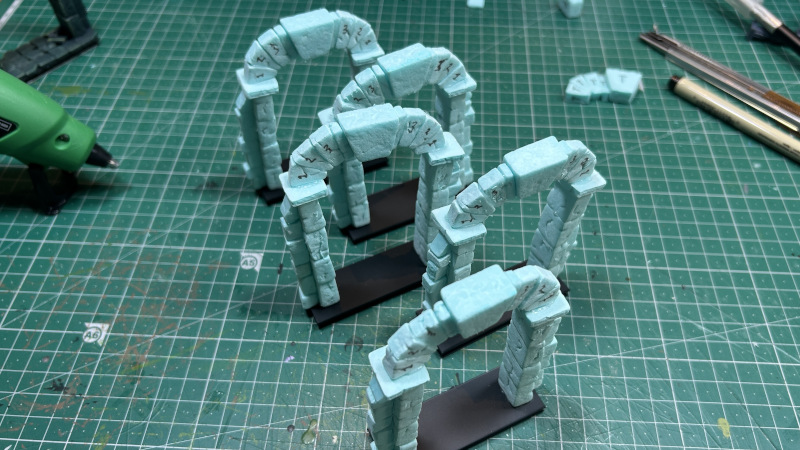
For this, we need to prepare a number of different blocks, cut out of XPS foam, and weathered using the techniques discussed previously (see the next image):
- A simple square, relatively flat block that “caps off” the pillars, these are around 15x15mm and 4mm thick.
- A wedge-shaped, large keystone. Mine are 1cm thick, with the top width being around 22mm and the bottom width around 13mm.
- Two “cheese wedges” that together make around a 45 degree angle.
- One “cheese wedge” that has one straight side, and one skewed.
- One skewed rectangular brick.
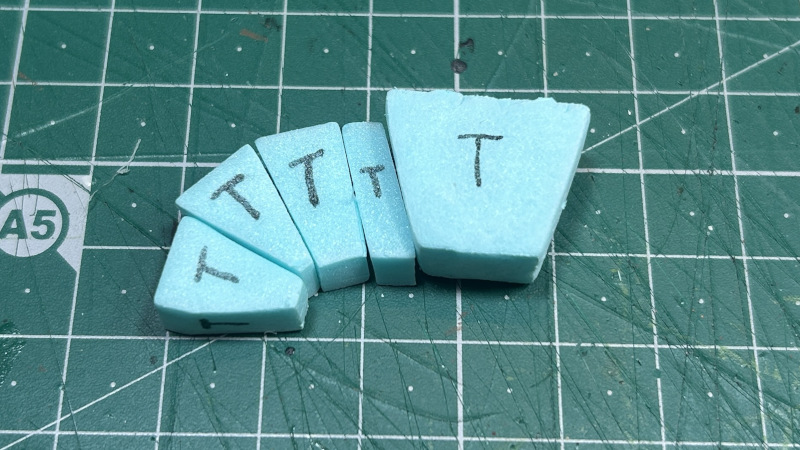
Obviously, this is the most tricky part of the build, and I recommend to take some time to prepare your “template” pieces for this. Start with creating a Keystone, then create the “cheese wedge” pieces to make the rounded corner. Place your pieces on the table and see how much space you still need to cover to connect the two pillars. Once you have a good “template”, start replicating the blocks.
After cutting the pieces I mark them with “1”, “2”, etc… to make sure I use the right pieces when building. Before gluing everything together, lay down the pieces on the table to make sure everything fits together well. Then, I start gluing from the keystone, attaching the other bricks to first create the full arch, and only then glue the arch to the pillars.
Building the Tile Floor
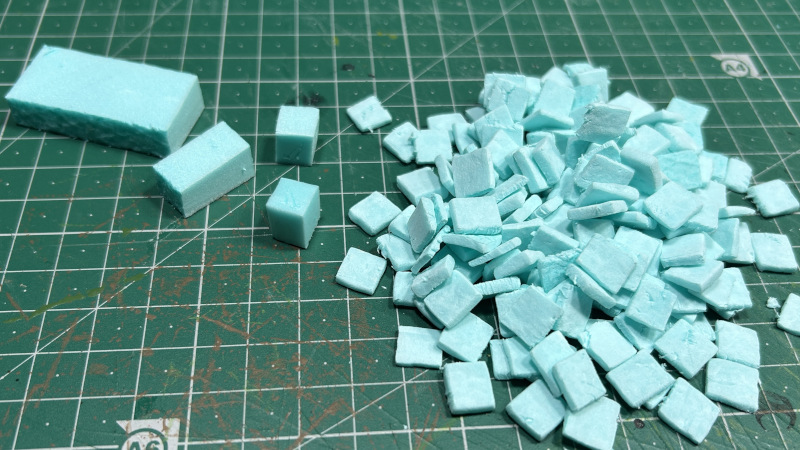
The final bit of XPS foam construction is to cover the connector base with some old looking dungeon floor tiles. For this, I cut out thin square pieces of XPS foam of about 1x1cm and 2.5mm thick. The XPS foam boards I use are 2cm thick, so I start by cutting off a strip of 1cm wide, then cutting off 1cm strips, and then cutting them in half. This gives me 1x1x1cm cubes that I then cut into 4 thin tiles. Apply some weathering using your plastic container with sharp rocks. Because these pieces are so thin, some of them might break during the process, so make sure you cut a bit more than you will need (around 25 tiles per archway).
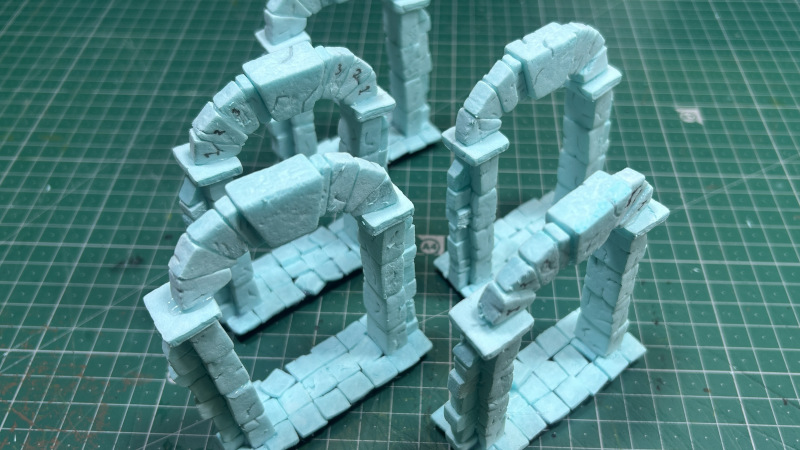
Then, it’s time to warm up the glue gun for the final time in this project and start gluing the tiles onto the floor. I start on the side, where you notice that you’ll need to cut off some corners of the tiles to make them fit around the pillars. The best way to make these cuts is explained in one of the thousand YouTube DIY videos on tiling a floor, so I’ll won’t repeat that here. Don’t be too neat in this process, and add some variety by having some tiles be slightly displaced, or having some tiles with chipped corners and edges.
Final Decorations
Now that the main construction is done, it’s time to add some final touches by raiding the bits box. It’s nice to add some small little details, to make sure all the archways look a little bit different. Personally I prefer not to overdo it, but a few skulls here and there, and some decorative shields adds a lot of character to the archways.
Never forget to carefully look for mold lines, and file them away! Especially after dry brushing later on, these will stick out like a sore thumb…
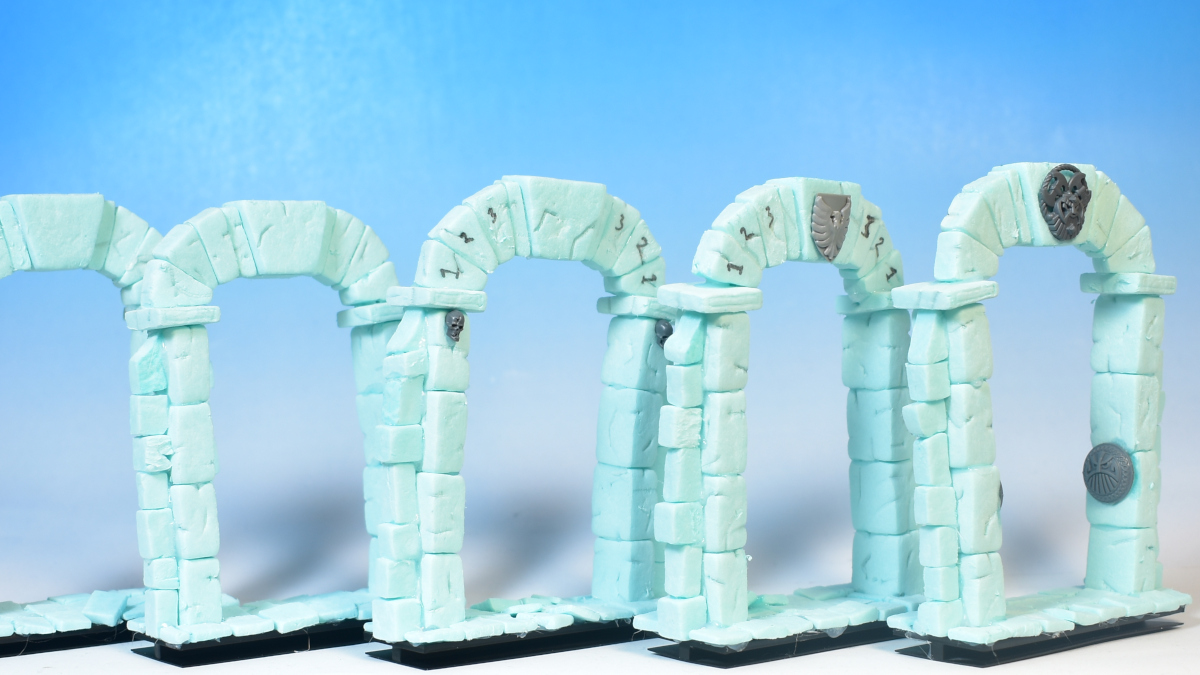
Each of the plastic parts you see here have been pinned and glued to the archways using super glue. Super glue is a little aggressive and can eat into the XPS foam, but this type of damage doesn’t look out of place and is covered up by the bits anyway.
The Painting Phase
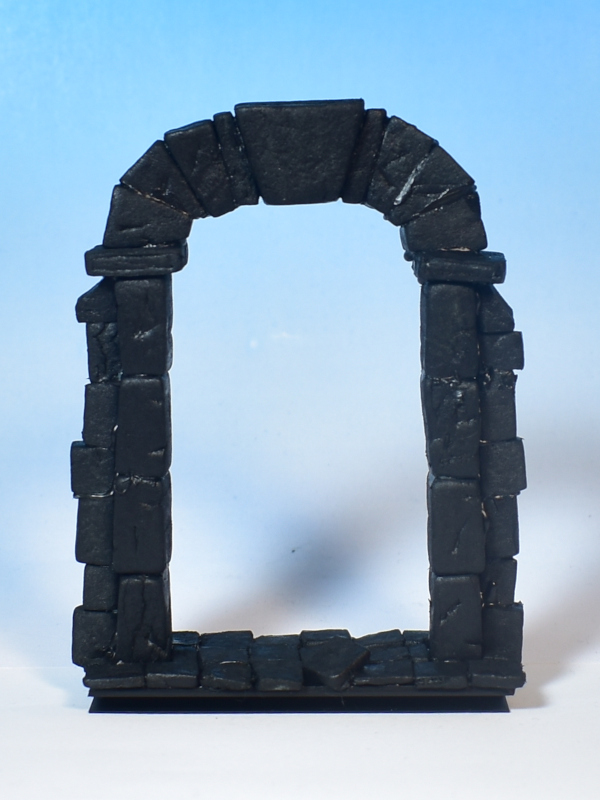
Time to tidy up the desk, get rid of the glue gun and all the construction material, and getting ready for some painting. To start, the XPS constructions need a good solid layer of undercoat, both as a base layer for the rest of the painting, but also to protect the material. Since the actual painting will be mostly about dry-brushing, it’s good to start from a dark base. I choose to paint everything completely black using a cheap craft store acrylic black paint. I really don’t recommend using your expensive miniature paints for this stage, as you will be needing a lot.
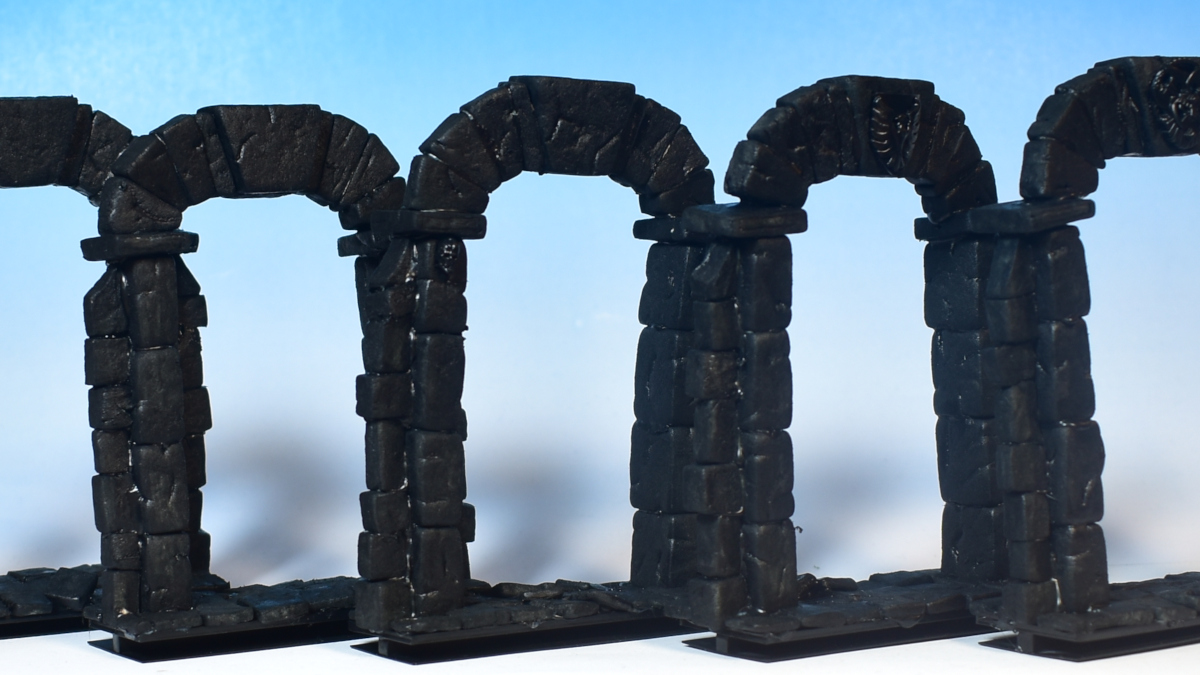
I mix the paint with plenty of water and apply a couple of layers to make sure there is no blueish spots showing through anywhere.
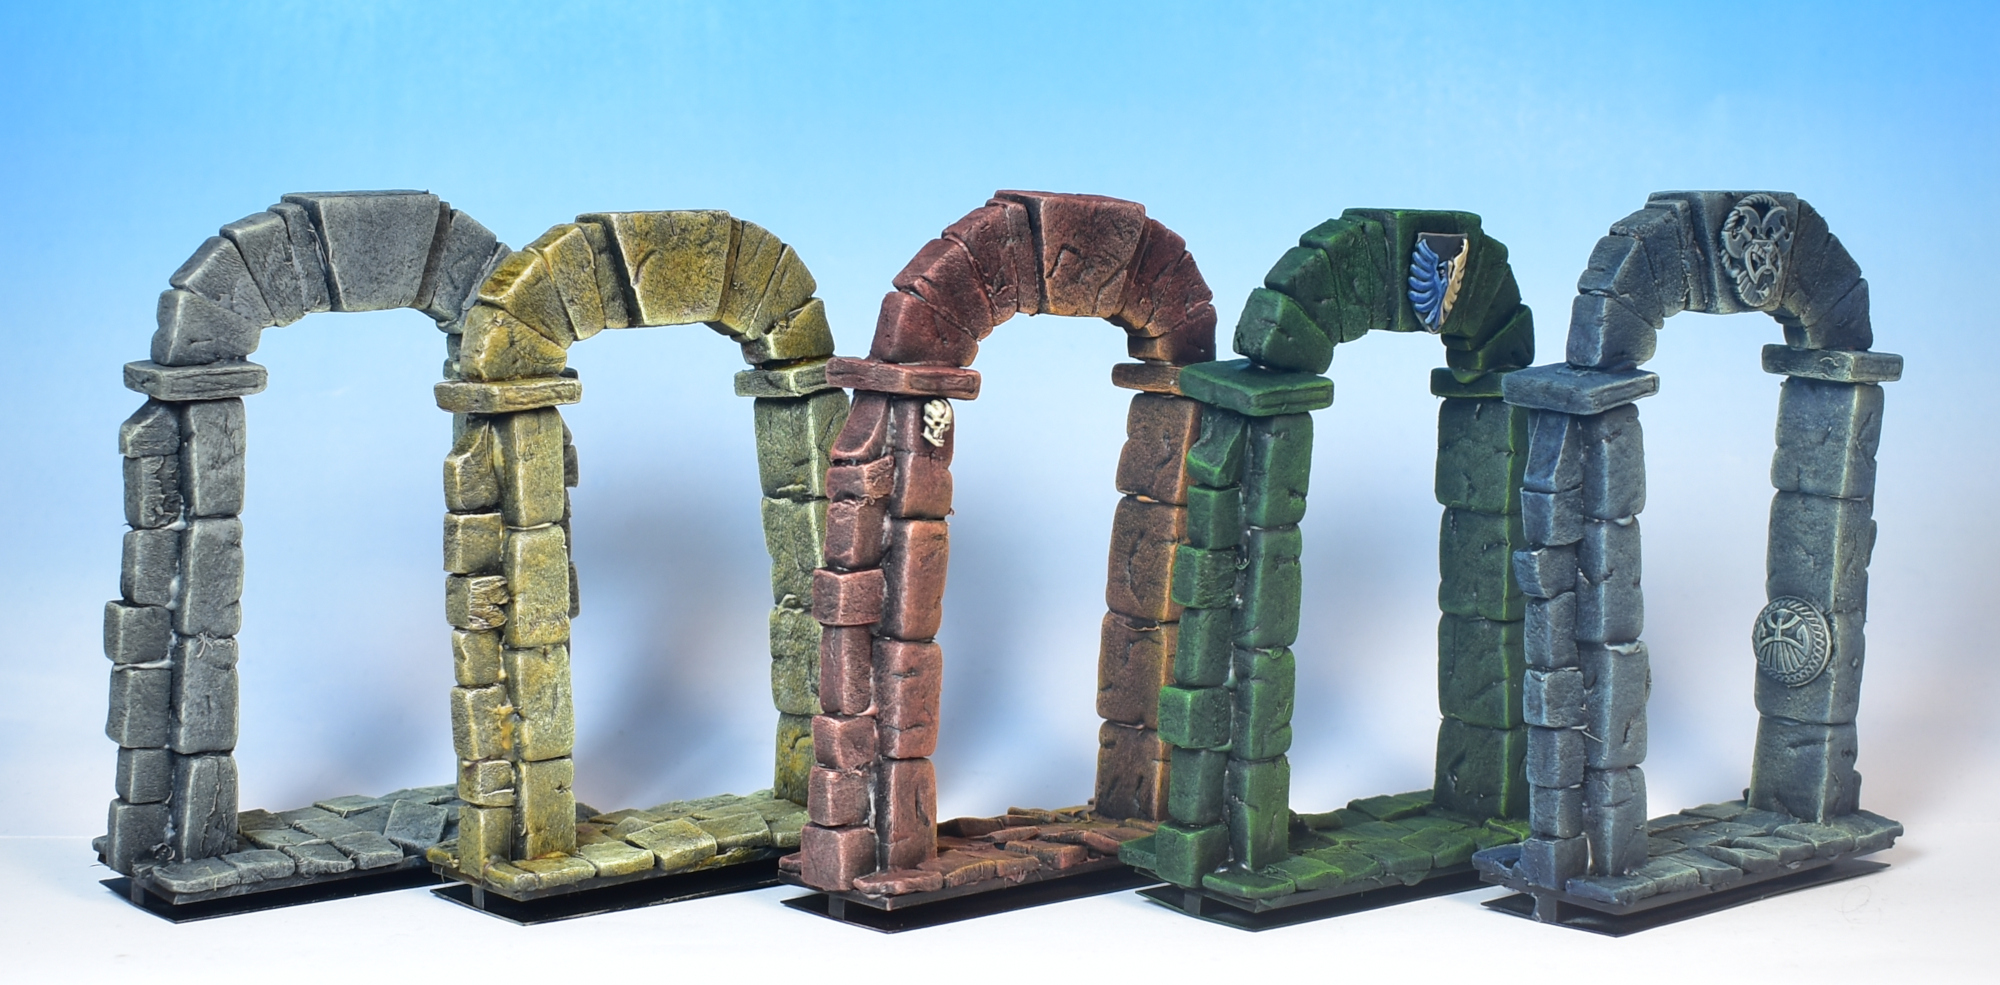
Now it’s time to give these archways some colour. The obvious thing to do here is to look at your collection of grey paints and pick something that looks like stone, but maybe it’s better to have a look at the Warhammer Quest dungeon tiles to draw some inspiration. A game of Warhammer Quest 1995 is actually, as most Warhammer games from the era, quite a colourful spectacle on the table: with brightly coloured goblins, and Goblin Green bases, as well as floor tiles in various shades of grey, green, orange and blue. Painting all those archways light grey simply doesn’t feel quite right, so below I show you my experiments with five different colourful schemes: a basic “Stony Grey”, a “Sandy Rock”, a “Red Stone”, a “Green Stone”, and a “Blue Stone”.
Time to paint!
Painting: Stony Grey
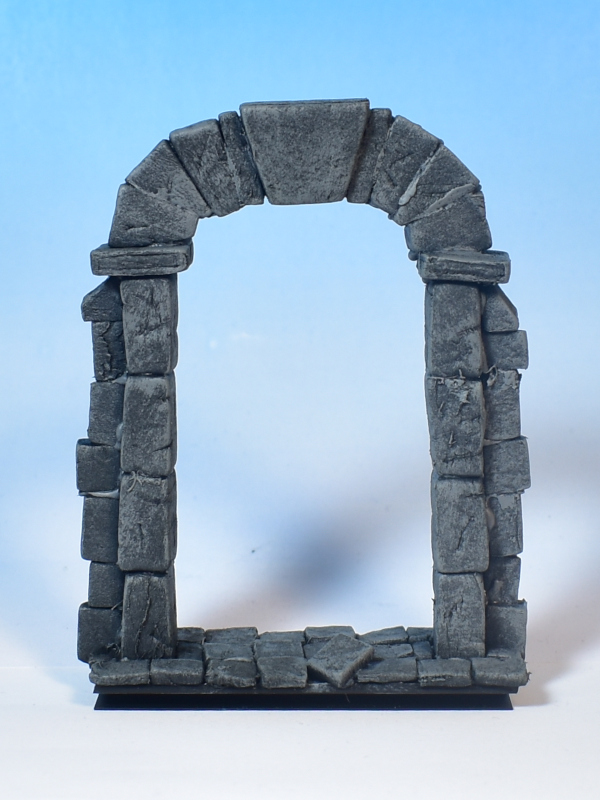
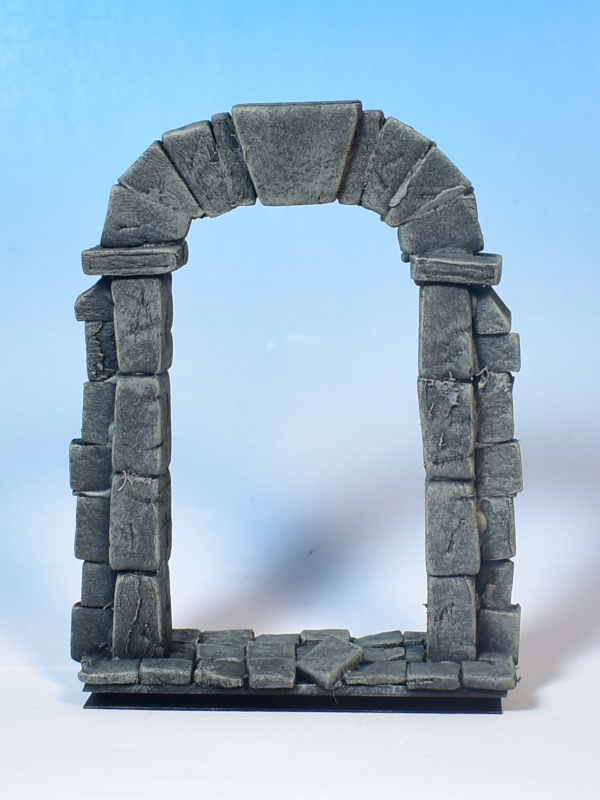
We start off with a traditional “Stony Grey” look in three simple steps. The first step is to do a heavy drybrush using Citadel: Dawnstone. Then, while your drybrush is still filled with the grey paint, add tiny amounts of Citadel: Dorn Yellow to the brush, wipe clean, and lightly drybrush everything, this time focusing on edges. The result should be that the stones have better defined edges and feel a little bit “warmer” due to the yellow. In the final step, we are going to focus on our “source of light”, which will be coming from inside the dungeon (the Barbarian carrying the Lantern). So, this time we properly dip the dry brush into the Dorn Yellow (the Dawnstone should be mostly gone from the brush by now), so that we are mostly drybrushing with yellow and focus on drybrushing the inside of the arch. Start with your brush on the inside of the archway and wipe the paint off towards the outside to create an “Object Source Lighting” (OSL) effect.
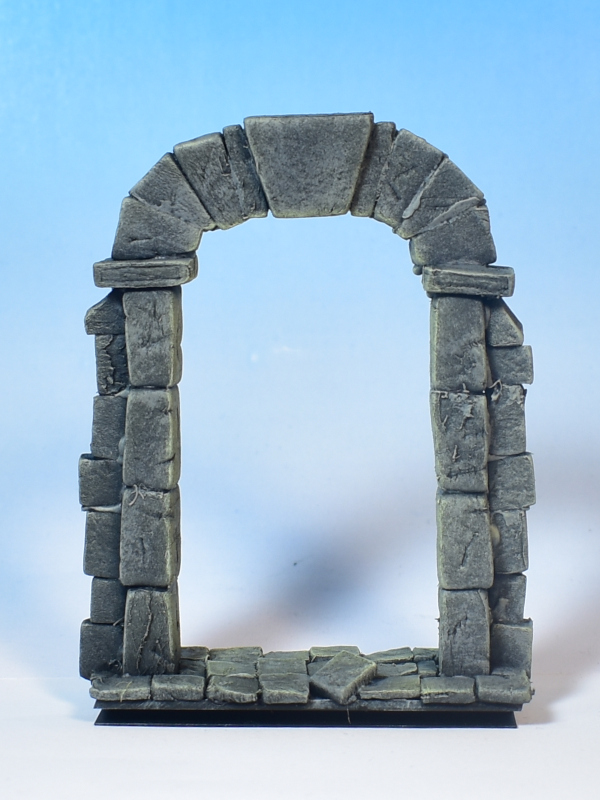
Painting: Sandy Rock
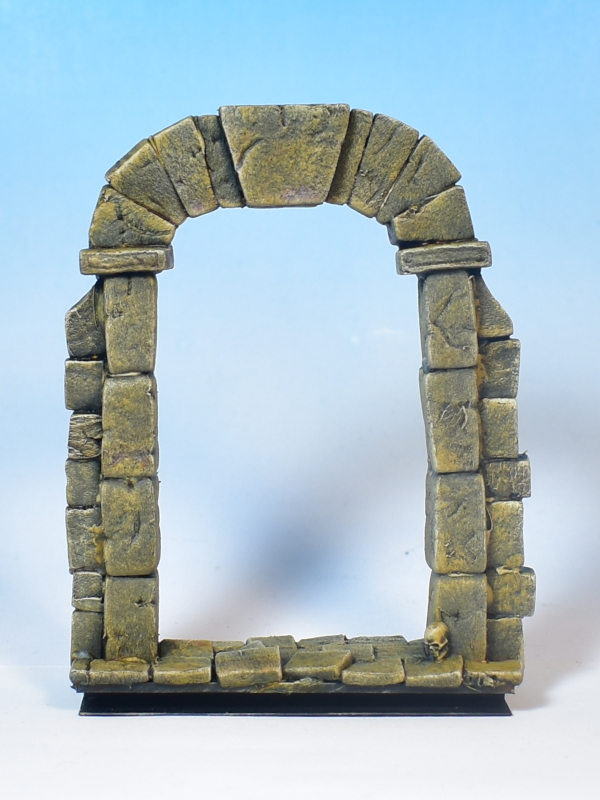
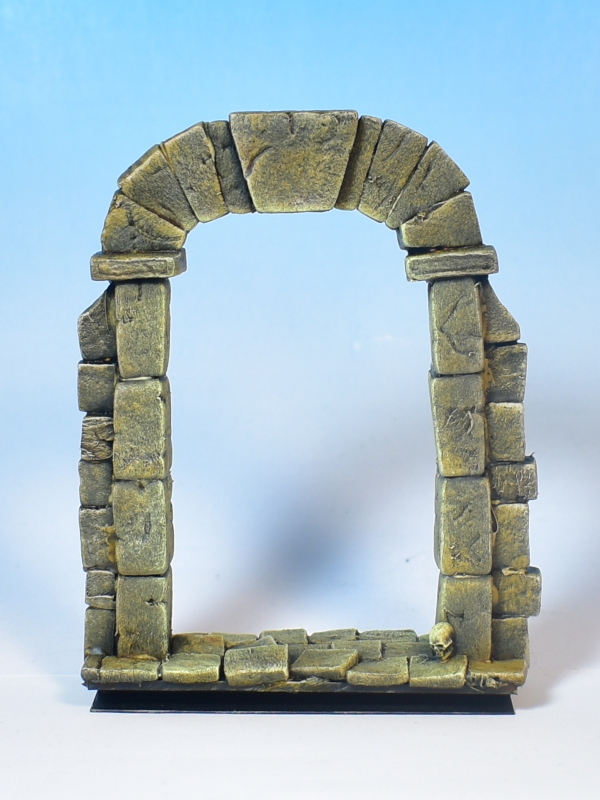
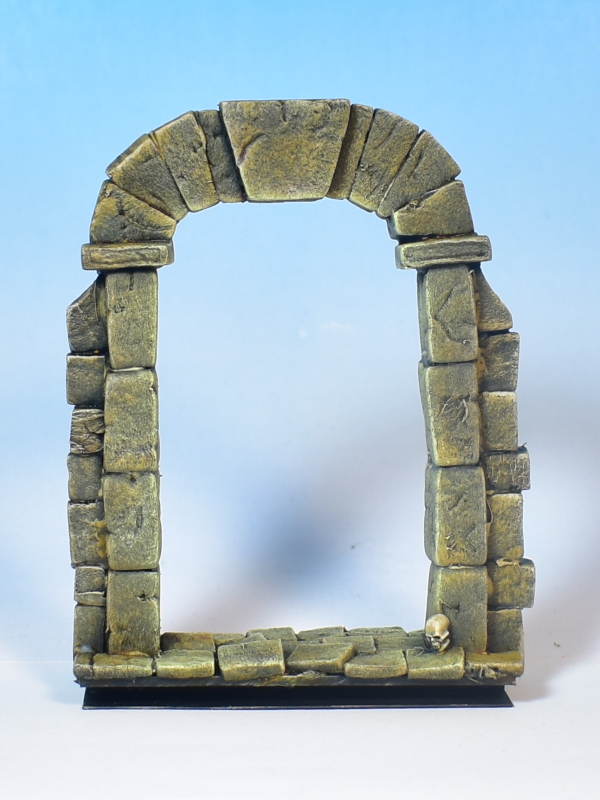
For our “Sandy Rock” arch we start with a very heavy dry brushing of Citadel: Zandri Dust. Then, to add a little bit more colour and achieve a slightly darker base colour, we apply a wash that is a 50/50 mix of Citadel: Seraphim Sepia, and Citadel: Casandora Yellow.
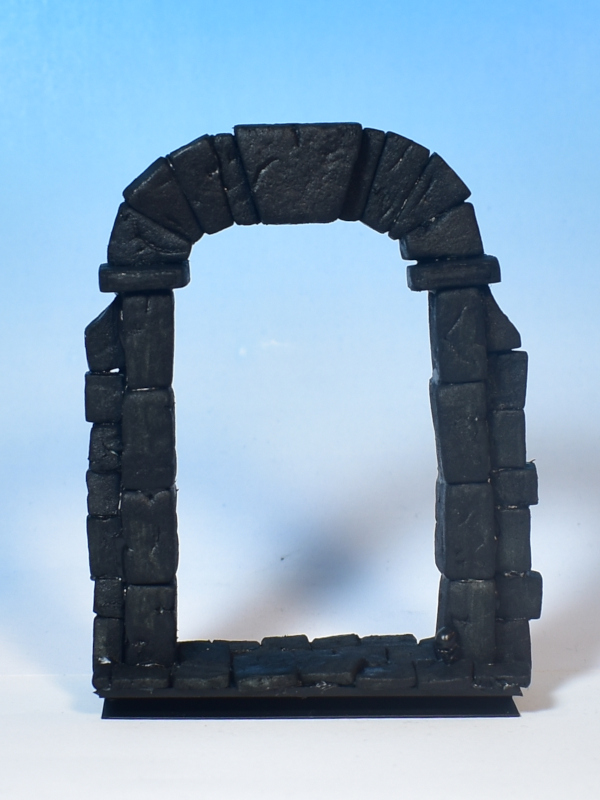
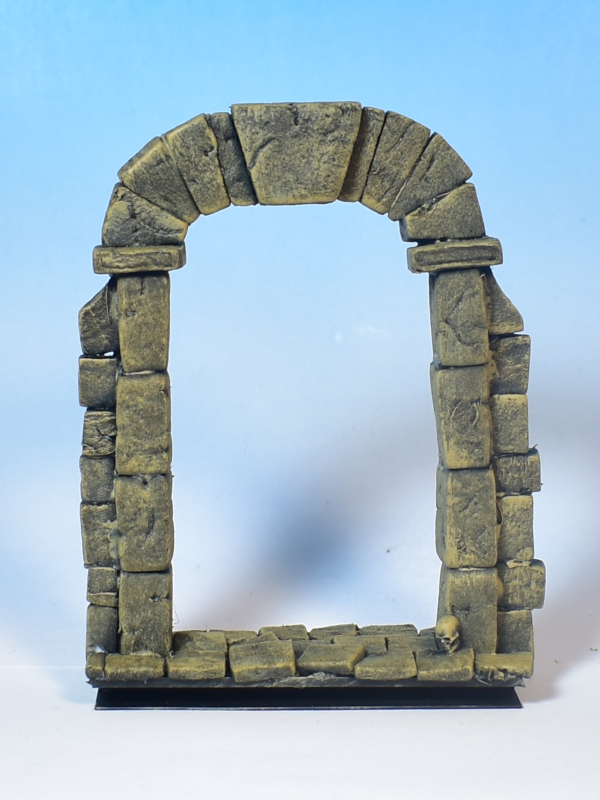
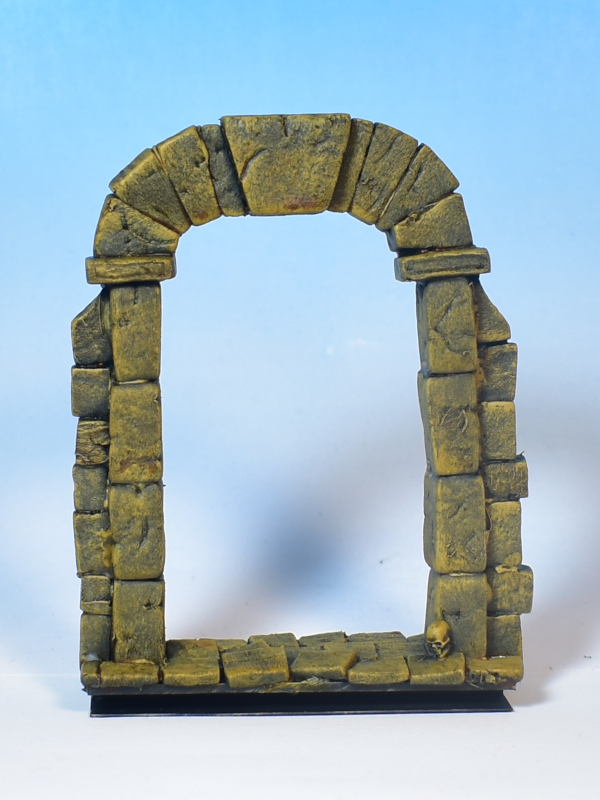
Then we use the same techniques as described above to bring up some highlights. Starting with a dry brushing all over using Citadel: Screaming Skull, focusing on all the raised edges. Then, we take Citadel: Dorn Yellow to create the “OSL” effect of the light shining on the stones from within the archway. Finally, although the skull allready looks pretty much like bone, we apply some bony colours to highlight up the skull, using Citadel: Zandri Dust and progressively adding more Citadel: Screaming Skull.
Painting: Red Stone
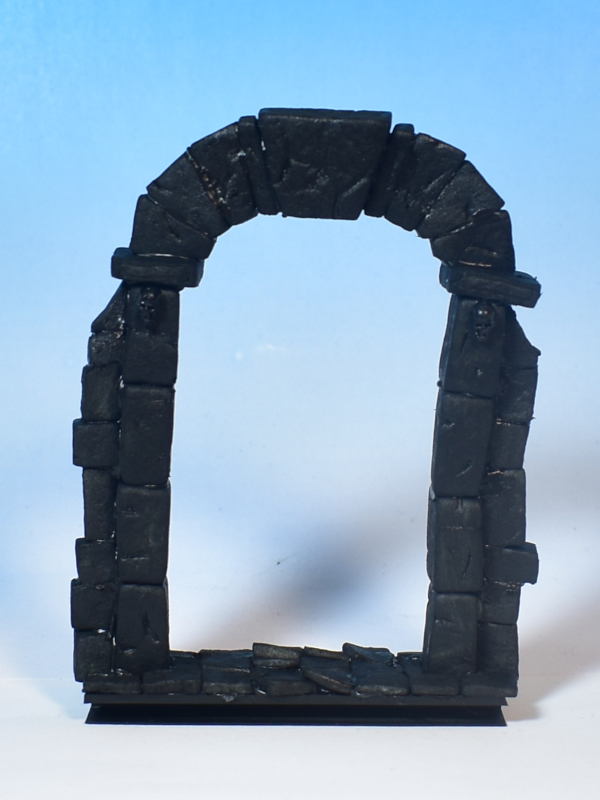
For the Red Stone Archway we continue using the same basic approach, this time again without applying any wash for shading. We start with a heavy dry brushing of Citadel: Squig Orange. As the paint doesn’t properly cover over the black undercoat, the result is nice terracotta-like red. Then we progressively add more Citadel: Screaming Skull to the orange to start highlighting the edges, and finally we use Vallejo: Sun Yellow to create the lighting effect coming from inside the arch.
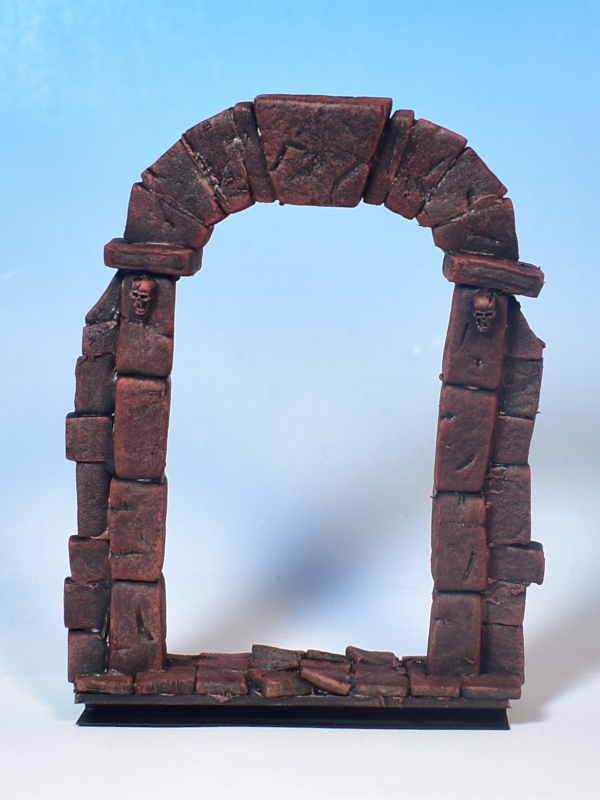
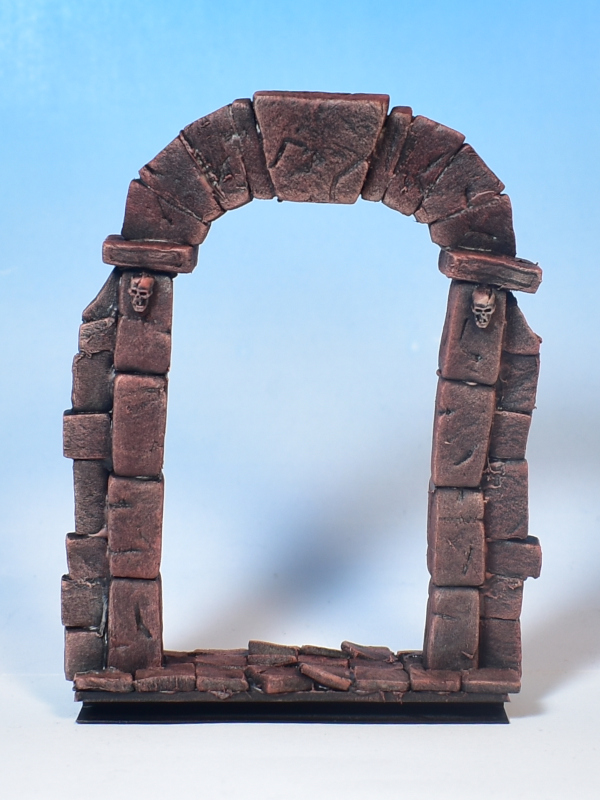
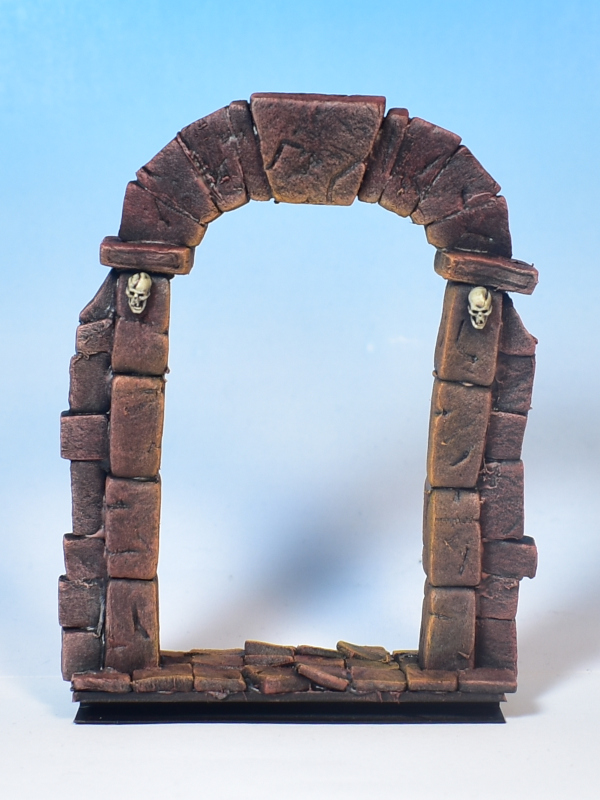
Painting: Green Stone
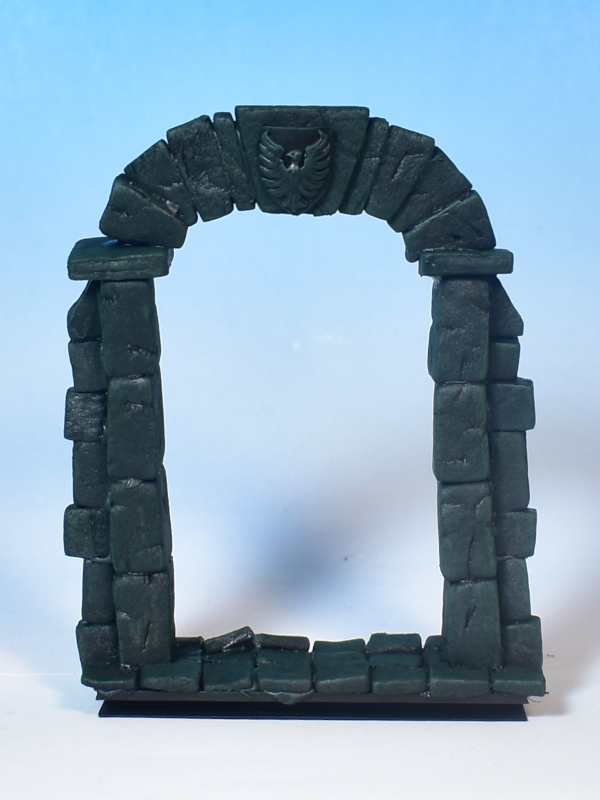
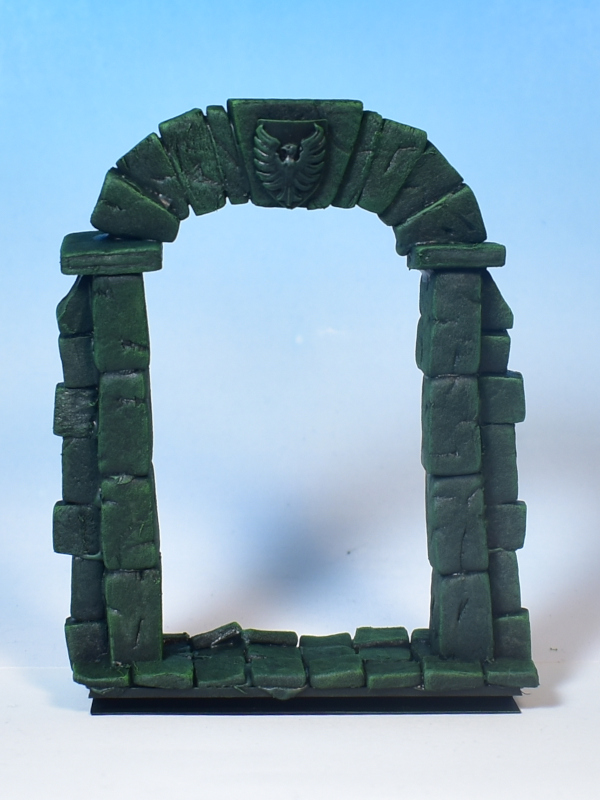
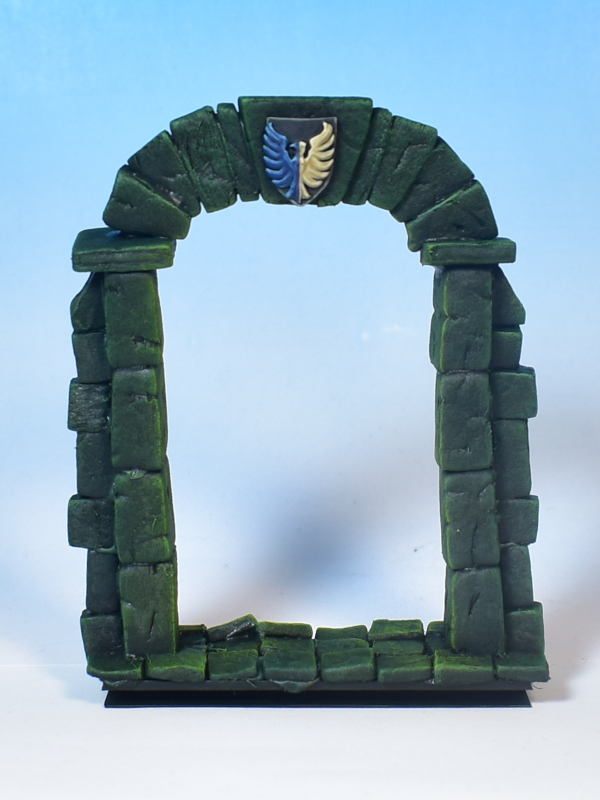
To achieve a murky “Green Stone” effect, our first layer of heavy dry brushing is done using Vallejo: Dark Green. Then, we add progressively more and more Citadel: Moot Green to the brush as a highlight colour to dry brush, focusing on the edges. Just add the Moot Green without cleaning your brush, and the paint will slowly start to get brighter. Finally, we use Vallejo: Sun Yellow to create the effect of the light shining from within the arch. In this case, I decided to paint the shield decoration using Vallejo: Imperial Blue and an off-white.
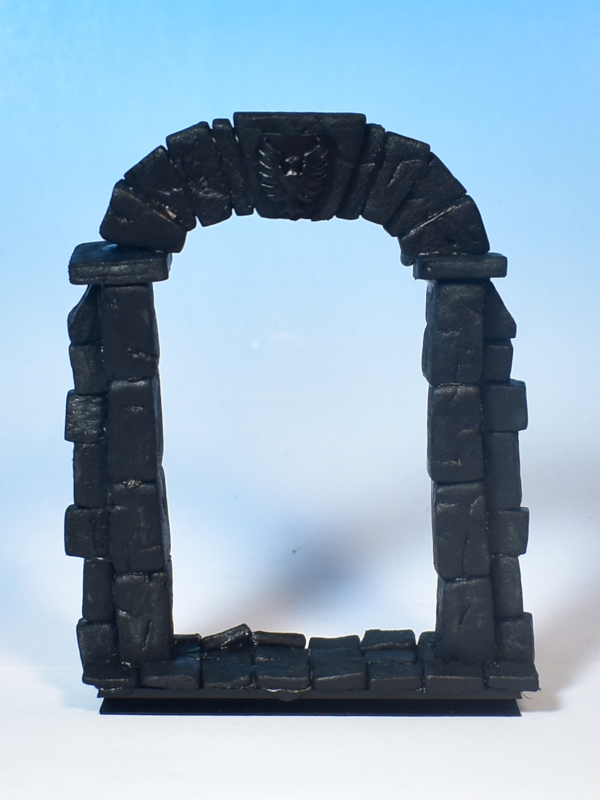
Painting: Blue Stone
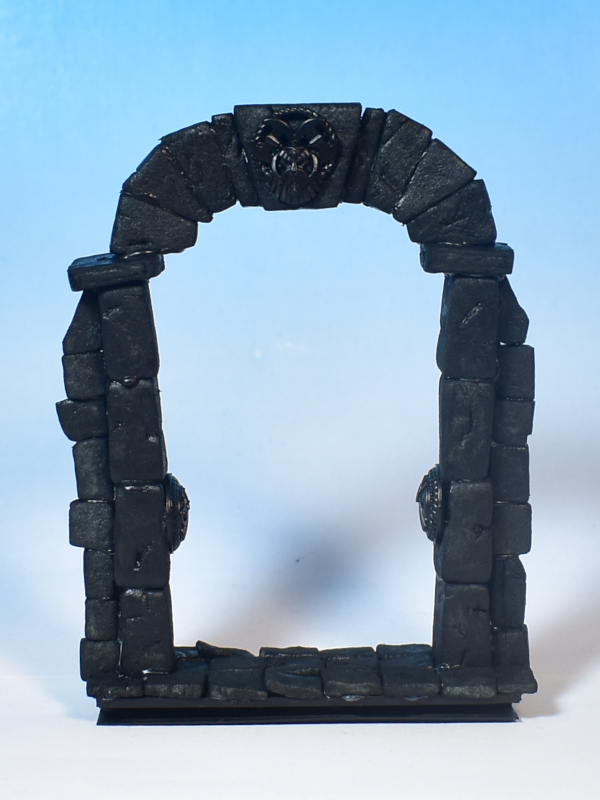
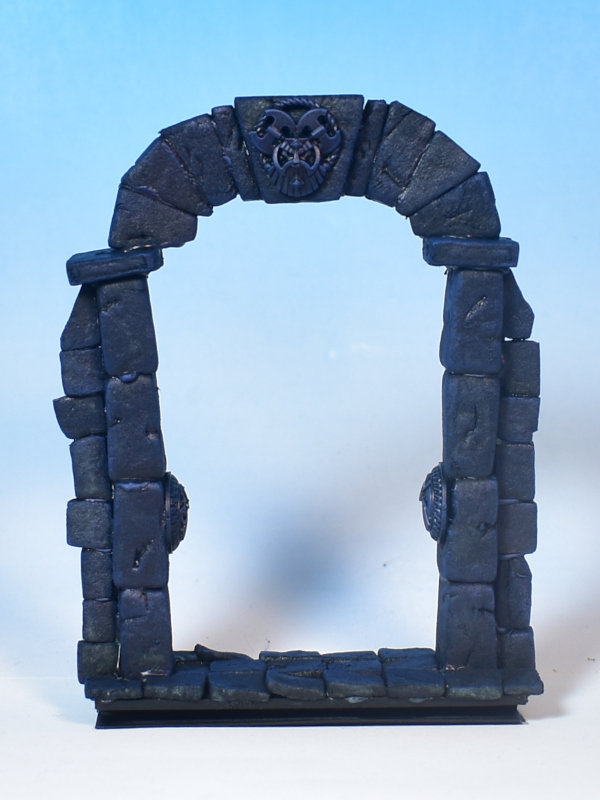
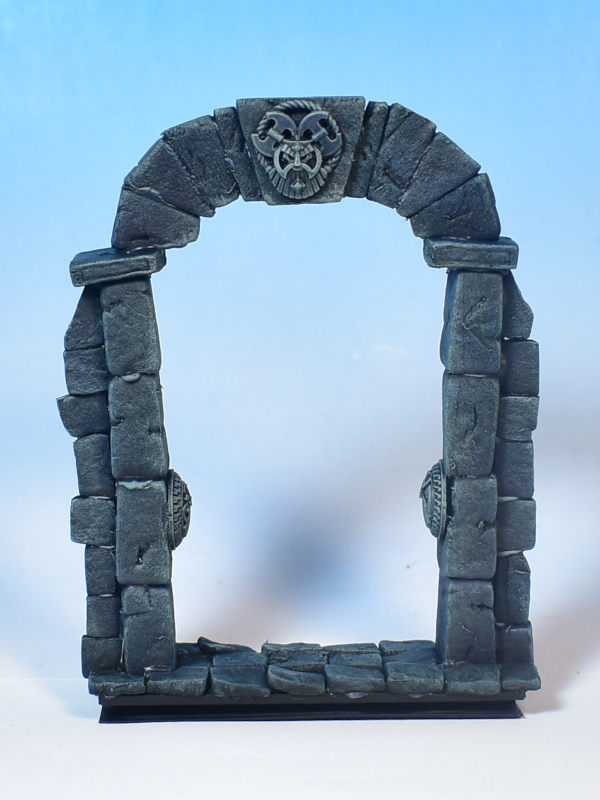
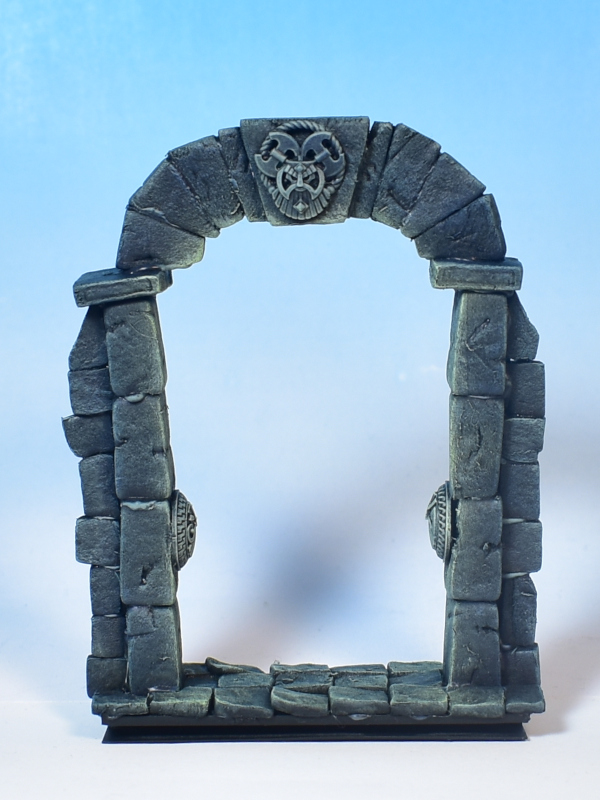
Our final Archway is getting a “Blue Stone” look like some ancient Dwarfen Hold. I start with a heavy dry brushing of Vallejo: Imperial Blue. Then, adding Citadel: Karak Stone to the mix to start defining the edges by focusing our dry brushing on them, and finally using Citadel: Dorn Yellow to create the effect of the light coming from inside of the archway. In this case, I decided not to specifically paint the decorations, so that they look like decorations that have been etched into the stone.
The Final Result
And here we have all our different Archways lined up next to each other. I’m personally very happy with how the red stone arch turned out. What’s your favourite colour scheme? Leave a comment down below!
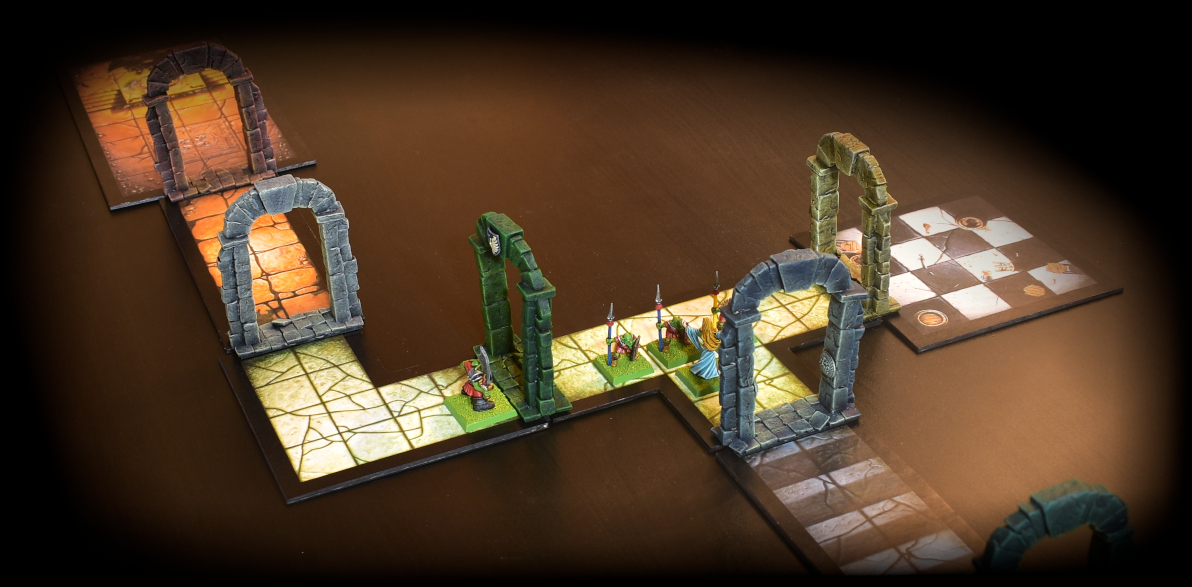
But ultimately, it’s just nice to see the different coloured archways in action on a colourful Warhammer Quest 1995 dungeon layout!
Closing Words…
If you have any question, feel free to leave a comment below, or drop me an email at harm@harmsworkshop.com. If you found this very useful and want to show some support, you can do so via my Ko-Fi page.
“The best thing about Warhammer Quest is the Archways!!!”
I see what you did there!
Great on them, nice to see crafting alive and well and it makes such a nice change from 3d printed stuff.
Lovely.
Glad someone got my BardicBroadcasts reference 😉 And yes, crafting can be a lot of work, but it’s a great fun part of the hobby in my view!